Map API
Map API structure in a nutshell
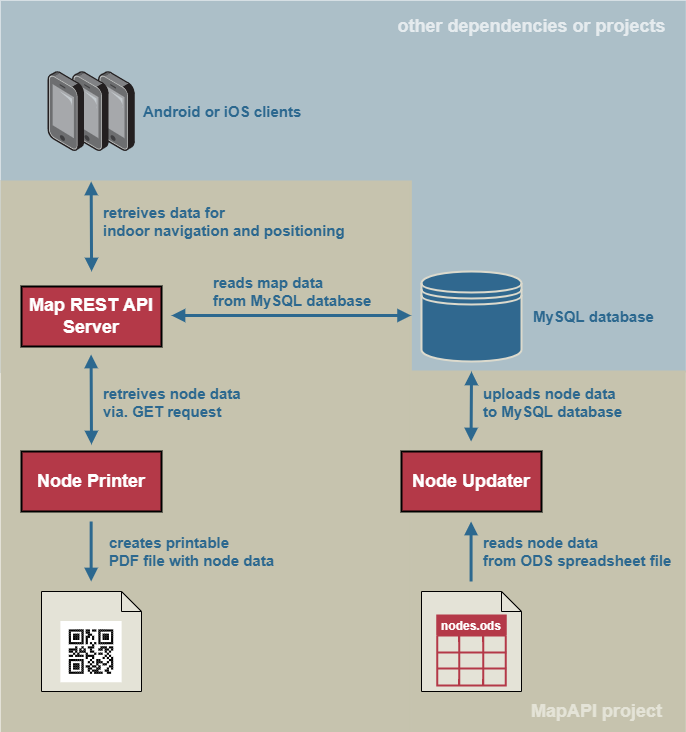
The MapAPI project, also called MAPI, is responsible for the indoor positioning of the Android and iOS clients, hereafter only called clients. Furthermore, the MapAPI helps to create suitable routes for the clients. Data is necessary for providing this service. For this reason, the MapAPI is divided into the following 3 components to maintain and distribute data:
- Node Updater
Node data is maintained in the MapAPI Git repository in a spreadsheet file in ODS format. If the data of the spreadsheet file changes, the Node Updater becomes active and starts its work. It receives the spreadsheet file and the login data for the MySQL server. Then it reads the data from the spreadsheet file and transfers it to the MySQL database.
- Map REST API server
This component is accessed by the Node Printer and the clients. Clients scan QR nodes in the building of the university, whereby an indoor position determination takes place. In doing so, clients ask for the ID of a node and receive GPS coordinates among other data. In addition, clients also receive data that is important for the route in the building. The Node Printer, on the other hand, only retrieves node data.
- Node Printer
The Node Printer communicates only with the Map REST API server to retrieve relevant data about the nodes. The Node Printer is controlled by persons from the Uni App team. As output, users receive a PDF file containing node data and a QR code from each of the desired nodes. These PDF files are then printed out and distributed in the building so that users can scan them and determine their location.
QR-Code and URL structure
If the users do not have installed the UniApp and scan the QR codes of the printed nodes, they will be redirected to the UniApp website.
Otherwise, the UniApp will recognize the scanned URL as an app link and will open itself with the associated location of the printed node on the map.
The scheme of the URL is: https://uniapp.informatik.uni-ulm.de/campusmap/ID_OF_THE_PRINTED_NODE.
The node ID (here: ID_OF_THE_PRINTED_NODE) is read of the previously mentioned URL and processed within the UniApp.
This mechanism was realized with the Traefik proxy server and it’s ReplacePathRegex middleware rule.
You can find the configuration file dynamic.yml of this mechanism on our uniapp bwCloud instance in the /etc/traefik/config directory.
You can find more information about Traefik in our documentation or in the offical documentation.
The described mechanism uses a very useful side effect.
On the one hand, we localize the user based on the scanned QR code.
On the other hand, we advertise the app in many places at the university, and at the same time we provide a valid URL to our website so that the app can be downloaded by as many users as possible.
Node Updater
The nodes are scanned by users and point to GPS coordinates. They are managed in a central spreadsheet file in the repository. After each push of a new version of a spreadsheet file, the updating script is triggered in a GitLab pipeline. This addresses the trade-off between development time and usability for managing the nodes. Furthermore, auditing and logging of the changes in the database are possible as this is captured by Gitlab. The script reads the nodes from the spreadsheet file, processes them, and loads them into a remote database. For security reasons, the credentials are never stored directly in the script and must always be passed as parameters each time the script is run. The credentials are managed in the Gitlab CI/CD variables and can be flexibly adjusted at any time. Furthermore, the script supports changing the database, such as moving to a new server.
Format of the spreadsheet file
The spreadsheet file must strictly comply with a given format. Otherwise, nothing will be saved in the database. The Node Updater exits with exit code 1 and outputs error messages. The very first row of the first sheet in the spreadsheet must follow the following constraints:
- First row (A)
Must be called ID and for all column numbers ≥ 2 in this row are only integers allowed. This attribute identifies each node. It must be unique. The Node Updater checks the uniqueness and aborts the processing if this is not the case.
- Second row (B)
Must be called Latitude and for all column numbers ≥ 2 in this row are only floating point numbers between -90.0 and +90 are allowed. Latitude is a part of a GPS coordinate. Please make sure that the value of the latitude is between 48.41681 and 48.42925. This is the relevant range for the University of Ulm.
- Third row (C)
Must be called Longitude and for all column numbers ≥ 2 in this row are only floating point numbers between -180.0 and +180.0 are allowed. Longitude is a part of a GPS coordinate. Please make sure that the value of the latitude is between 9.93327 and 9.97256. This is the relevant range for the University of Ulm.
- Fourth row (D)
Must be called Level and this attribute denotes the floor in a university building. For all column numbers ≥ 2 only one value of the following enumeration in this row are allowed:
LEVEL_ONE,LEVEL_TWO,LEVEL_THREE,LEVEL_FOUR,LEVEL_FIVE,LEVEL_SIX,LEVEL_SEVEN,LEVEL_EIGHT. For simplicity, the Node Updater also accepts the following numbers instead:1,2,3,4,5,6,7,8. The Node Updater converts the numeric values into the previously mentioned values in the enumeration for you. Some levels are redundant, but we think that will meet future requirements if the university plans to build buildings with a higher number of levels than 8.- Fifth row (E)
Must be called Color and this attribute describes which color the printed node sheet should have. For all column numbers ≥ 2 only one value of the following enumeration in this row are allowed:
RED,GREEN,BLUE,ORANGE. Nice to know: The chosen colors are based on the colors of the four faculties of the University of Ulm. Red corresponds to the Faculty of Engineering, Computer Science and Psychology, green for the Faculty of Mathematics and Economics, orange for the Faculty of Natural Sciences, and blue for the Faculty of Medicine.- Sixth row (F)
Must be called Building and this attribute describes the building in which the printed node is located. There are no restrictions. You can use any string. This attribute is useful within the Node Printer. For example: O27
- Seventh row (G)
Must be called Location and this attribute describes the building in which the printed node is located. There are no restrictions. You can use any string. This attribute is useful within the Node Printer. For example: Node between H22 and seminar rooms.
A valid spreadsheet format could be:
ID |
Latitude |
Longitude |
Level |
Color |
Building |
Location |
|---|---|---|---|---|---|---|
1 |
48.4219248 |
9.9558221 |
LEVEL_ONE |
RED |
OUTSIDE |
Bus stop south |
2 |
48.42177 |
9.95539 |
LEVEL_ONE |
BLUE |
O25 |
cantine |
… |
… |
… |
… |
… |
… |
… |
Attention
The Node Updater uses the jOpenDocument Library that prevents arbitrary use of documents in Open Document Format, or ODF. It is essential to notice that only ODS files in ODF format of 1.2 or less are supported. If this is not the case, errors within the library will occur and the Node Updater will terminate with exit code 1. Most programs create spreadsheet documents with at least ODF version 1.3. Be aware of this matter. You can change the ODF version of a document within the spreadsheet program to version 1.2.
For example, this can be changed in Libre Office as follows:
Open Tools > Options > Load/Save > General and select a version ≤ 1.2.
How to use?
Using the Node Updater is very simple. The Node Updater simply needs the server address, the credentials of the user, and a spreadsheet. It converts the contents of the spreadsheet file into nodes and puts them into a remote MySQL database.
Important options and arguments
The Node Updater only accepts inputs via program arguments. Inputs via the command line are not possible. If essential program arguments are missing, the Node Updater aborts the procedure with a warning and an exit code 1. An option is always passed together with an argument value according to the following scheme: -shortoption <argument value> or --longoption <argument value>
The following connection options are supported:
-hor--host: hostname or ip address of the database management system (required)-por--port: port of the running database management system process on host (optional, default: 3306)
The following credential options are supported:
-uor--user: username of the MySQL user (required)-pwor--password: password of the MySQL user (required)
The following other options are supported:
-dbnor--databasename: name of the affected database (optional, default: mapi)-for--filename: name of the spreadsheet file (optional, default: nodes.ods in the same directory as the Node Updater)-lor--loglevel: Only the log levelallis supported. This includes informational and warning messages. (optional, if this option isn’t used, only warning messages are displayed.)
In general you can run a jar file with the following command:
java -jar <name of jar-file> -<option 1> <argument value 1> ... -<option N> <argument value N>
For example, we have a Node Updater jar file, called fancyNodeUpdater.jar.
We want to use the user coolUser with the password password123 (Never use this password in the real world!!!11!).
The DBMS server has the hostname db.some.domain.
The port is 22333 and the database name is located in the same directory as the jar file but called someNodes.ods.
We don’t want all messages and only the warnings. The command for this described constellation looks like this:
java -jar fancyNodeUpdater.jar -h db.some.domain -p 22333 -u coolUser -p password123 -f someNodes.ods
Nice to know
There is no fixed sequence of arguments. All orders are allowed as long as the required options are included with their arguments in the command.
Usage without options and arguments
The previous chapter described how the Node Updater can be used in a script in an automated way by passing options and arguments. Furthermore, the Node Updater can also be used without passing options and arguments. This is particularly useful if the Node Updater is used by people. In this case, the users of the Node Updater must interact with it via the command line and pass the parameters, which were previously passed as start arguments, via the command line.
We take our cue from the previous example again here and run the Node Updater, which is called fancyNodeUpdater.jar.
We connect to the host db.some.domain and the port 22333. We use the user coolUser and its password password123.
The someNodes.ods is in the same directory as the fancyNodeUpdater.jar.
To pass this information to the Node Updater over the command line interface, the following syntax must be met:
<long name of option>:<argument of option>
Attention
If your argument value doesn’t start with a space, you should avoid it between the colon and the argument value.
If all information are passed over the command line interface the following command should be sent:
start
You can cancel the procedure if you type in the following command:
cancel
To continue our previous example we must start our node updater:
java -jar fancyNodeUpdater.jar
After starting the Node Updater we should type in the following commands:
host:db.some.domain
port:22333
user:coolUser
password:password123
file:someNodes.ods
start
Nice to know
If you notice a typo in your passed values you can rewrite the command. This will overwrite the existing value. The last occurrence of the command is the latest value. Also there is no fixed sequence of commands as shown in the following example.
This is an example which overwrites the passed values:
host: db.some.domain
user:poorUser
password:password
port:22333
file:wrongNodes.ods
host:db.some.domain
user:coolUser
password:password123
file:somNode.ods
file:someNodes.ods
start
Thus it is equivalent to this command sequence:
host:db.some.domain
port:22333
user:coolUser
password:password123
file:someNodes.ods
start
Node Printer
The NodePrinter has an interface for controlling the application. The application enables the desired QR code to be generated as a .pdf in DIN A4 format. This can be printed out accordingly and attached to the intended location.
Basic information
The NodePrinter is a GUI to create the QR Codes, directly as .pdf. Implementation: Java 18 with the packages JavaFX (UI) and itextpdf (QR Code & PDF).
Application
NodePrinter is an application that creates a PDF containing a QR code. The QR code is used for navigation. The resulting printed document should be posted in the designated place in the university. The application itself consists of an interface that provides the selection of the node(s) and then generates the corresponding PDFs after confirmation. The storage location is in the output folder. If this folder does not exist yet, then please create it. In this folder the .pdf will be created with the corresponding node name.
How to start the NodePrinter?
The MAPI module contains a jar. Executing the jar will start the NodePrinter. Alternatively, the project can be executed by running StartApplication.java.
What can the NodePrinter do?
The NodePrinter can either generate the .pdf with QR code for all rooms stored in the database at once or alternatively for the selected room. For this it is recommended to sort by the building, so that the matching entry can be found quickly.
Structure of the PDF
A PDF has (so far) a very clean structure. First, as a header, the headline “Uni App”. Then comes the QR code, which functions as described in the section “Map API structure in a nutshell -> Nice to know”. The QR code has the color assigned to the node in the database. As a choice there is one of the colors: BLUE, RED, GREEN and ORANGE. These were chosen according to the corporate design of the University of Ulm. Below the QR code follows a small “How to”, which requests the reader to install the app.
Structure of the code
The actual PDF is created in the class PDF Generator. Here the title, the QR code with the logo of the University of Ulm is provided, and below a small “How to” is inserted. Furthermore, the size of the pdf or resulting page can also be changed in the generatePDF method. Note, however, that the layout is currently hardcoded for DIN A4 and must be adapted accordingly. This could be adapted in the context of a code optimization, if necessary.
The connection to the database takes place via the server. Currently there are two separate functionalities, once you can retrieve all rooms at once or by ID a specific room. Even though the QR codes are not necessarily assigned to rooms, but also to positions within the university, the class was still called Rooms for a simpler visual understanding and clear separation from the term Location, which was used within the CampusMap.
Immediately upon getting a room from the database, this is converted into a suitable data structure in Java by the Room class. Notice that the color coding is matched directly into a Java.AWT.Color. The colors correspond to the Cooperate Design (see: https://www.uni-ulm.de/misc/corporate-design/) of the University of Ulm and stand for the individual institutes.
What are the external dependencies?
The NodePrinter uses the JavaFX (for the UI) and itextpdf (to create the QR code and the PDF) packages. For changes to the NodePrinter please read the corresponding documentation.
REST API server
The server manages all REST ressources. There are ressources for node retrieving and for navigation. Nodes are scanned within the university. By scanning an QR Code the device calls the server with the url https://uniapp.informatik.uni-ulm.de/mapi/v0/node/NODE_ID. If the app is installed on the device it directly will show the position of that qr code, otherwise it will navigate to the UniApp homepage where the download of that app is possible. The NodePrinter uses these ressources to create a template for that qr codes. The navigation is implemented with the GraphHopper framework. Read more about it in the `Indoor Navigation`_ chapter.
Since the documentation have been written at the time of Version 0 of the Map API the url is https://uniapp.informatik.uni-ulm.de/mapi/v0. Now we can simply add the ressource we need to the url to retrieve the data. Below are listed all existing ressources.
- /node
By calling this ressource all nodes in the database will be retrieved in form of a JSON-Array.
- /node/NODE_ID
The
NODE_IDis just an integer which is assigned to a certain node. The node contains data that can be looked up in the Node Updater chapter. The node with theNODE_IDwill be retrieved by calling this ressource.- /node?limit=LIMIT_NUMBER
The
LIMIT_NUMBERis an integer. The limit parameter determines all nodes till the givenLIMIT_NUMBER. All nodes with anNODE_IDsmaller than thisLIMIT_NUMBERwill be retrieved.- /node?offset=OFFSET_NUMBER
The
OFFSET_NUMBERis an integer. The offset parameter determines all nodes greater than theOFFSET_NUMBER. All nodes with anNODE_IDgreater than thisOFFSET_NUMBERwill be retrieved.- /node?limit=LN&offset=ON
This is a mix of limit and offset parameter. This ressource retrieves all nodes with an
NODE_IDbetween the range ofOFFSET_NUMBER (ON)andLIMIT_NUMBER (LN).- /routing/send
Consumes a JSON with the longitude, latitude and the building level of the start and target position. Retrieves that data which navigates point to point with the use of the Graphhopper.
The following block shows how the JSON for the /routing/send HTTP-Request could look like.
{
  "startLongitude": "{START_LONGITUDE_DOUBLE_VALUE}",
  "startLatitude": "{START_LATITUDE_DOUBLE_VALUE}",
  "startLevel": "{START_LEVEL_INT_VALUE}",
  "targetLongitude": "{TARGET_LONGITUDE_DOUBLE_VALUE}",
  "targetLatitude": "{TARGET_LATITUDE_DOUBLE_VALUE}",
  "targetLevel": "{TARGET_LEVEL_INT_VALUE}"
}
Starting the server is simple. A CI/CD script starts the server when changes have been made to the server. It uses inputs via programm arguments. These inputs have to be set with start of the server. The server simply needs the database server adress and the port and the user login credentials.
The server needs specified inputs that are only accepted as program arguments.
The server checks for all needed arguments and if some are missing it aborts the start with a warning which argument is missing and an exit code 1.
If an arguments is unknown to the server it aborts the start with a warning and an exit code 1.
An option has to be passed together with an argument value according to the following scheme:
-shortoption <argument value> or --longoption <argument value>
Following options are supported and required ones have to be past via program arguments:
-hor--host: hostname or ip address of the database management system (required)-por--port: port of the running database management system process on host (optional, default: 3306)-uor--user: username of the MySQL user (required)-pwor--password: password of the MySQL user (required)-dbnor--databasename: name of the affected database (required)-asor--apisecret: api secret key that the server should use
Navigate to src/main/java/de/uni_ulm/informatik/uniapp/mapi/MapAPI.java in the server submodule.
Right-click and go to
More Run/Debugand thanModify Run Configuration....A window will open with an empty slot where you can enter the program arguments.
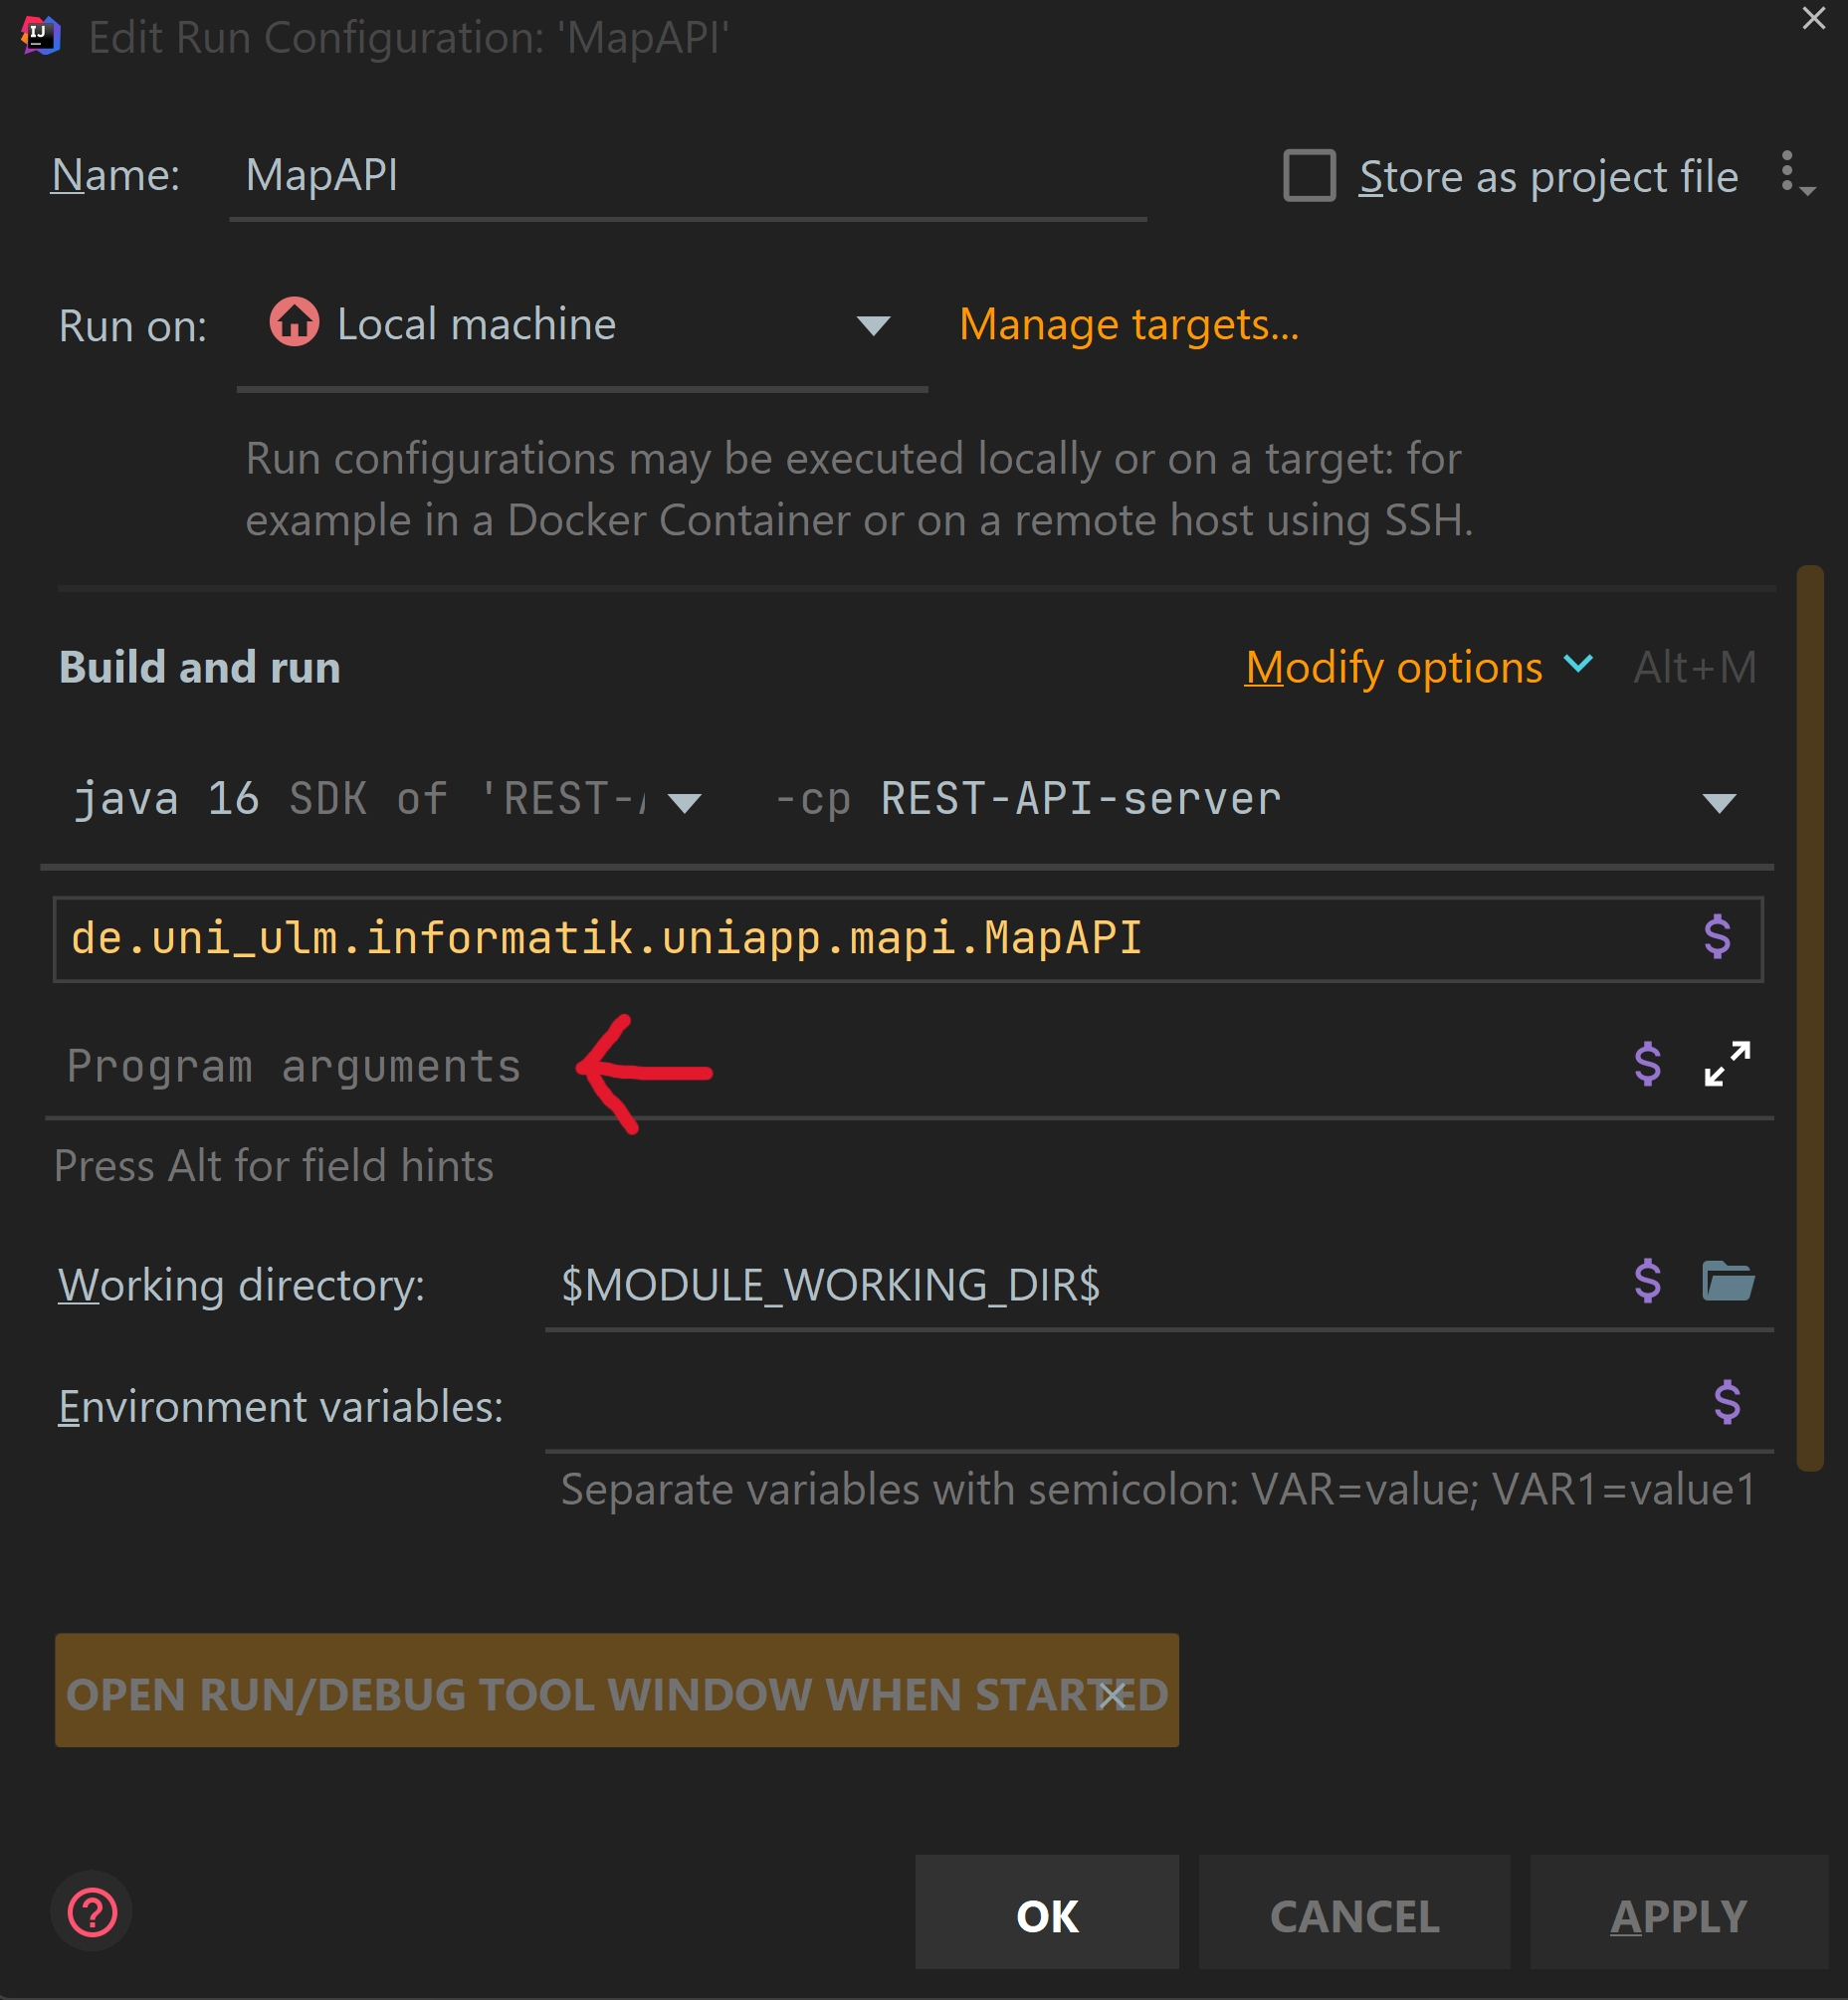
For example it can look like on the following picture.
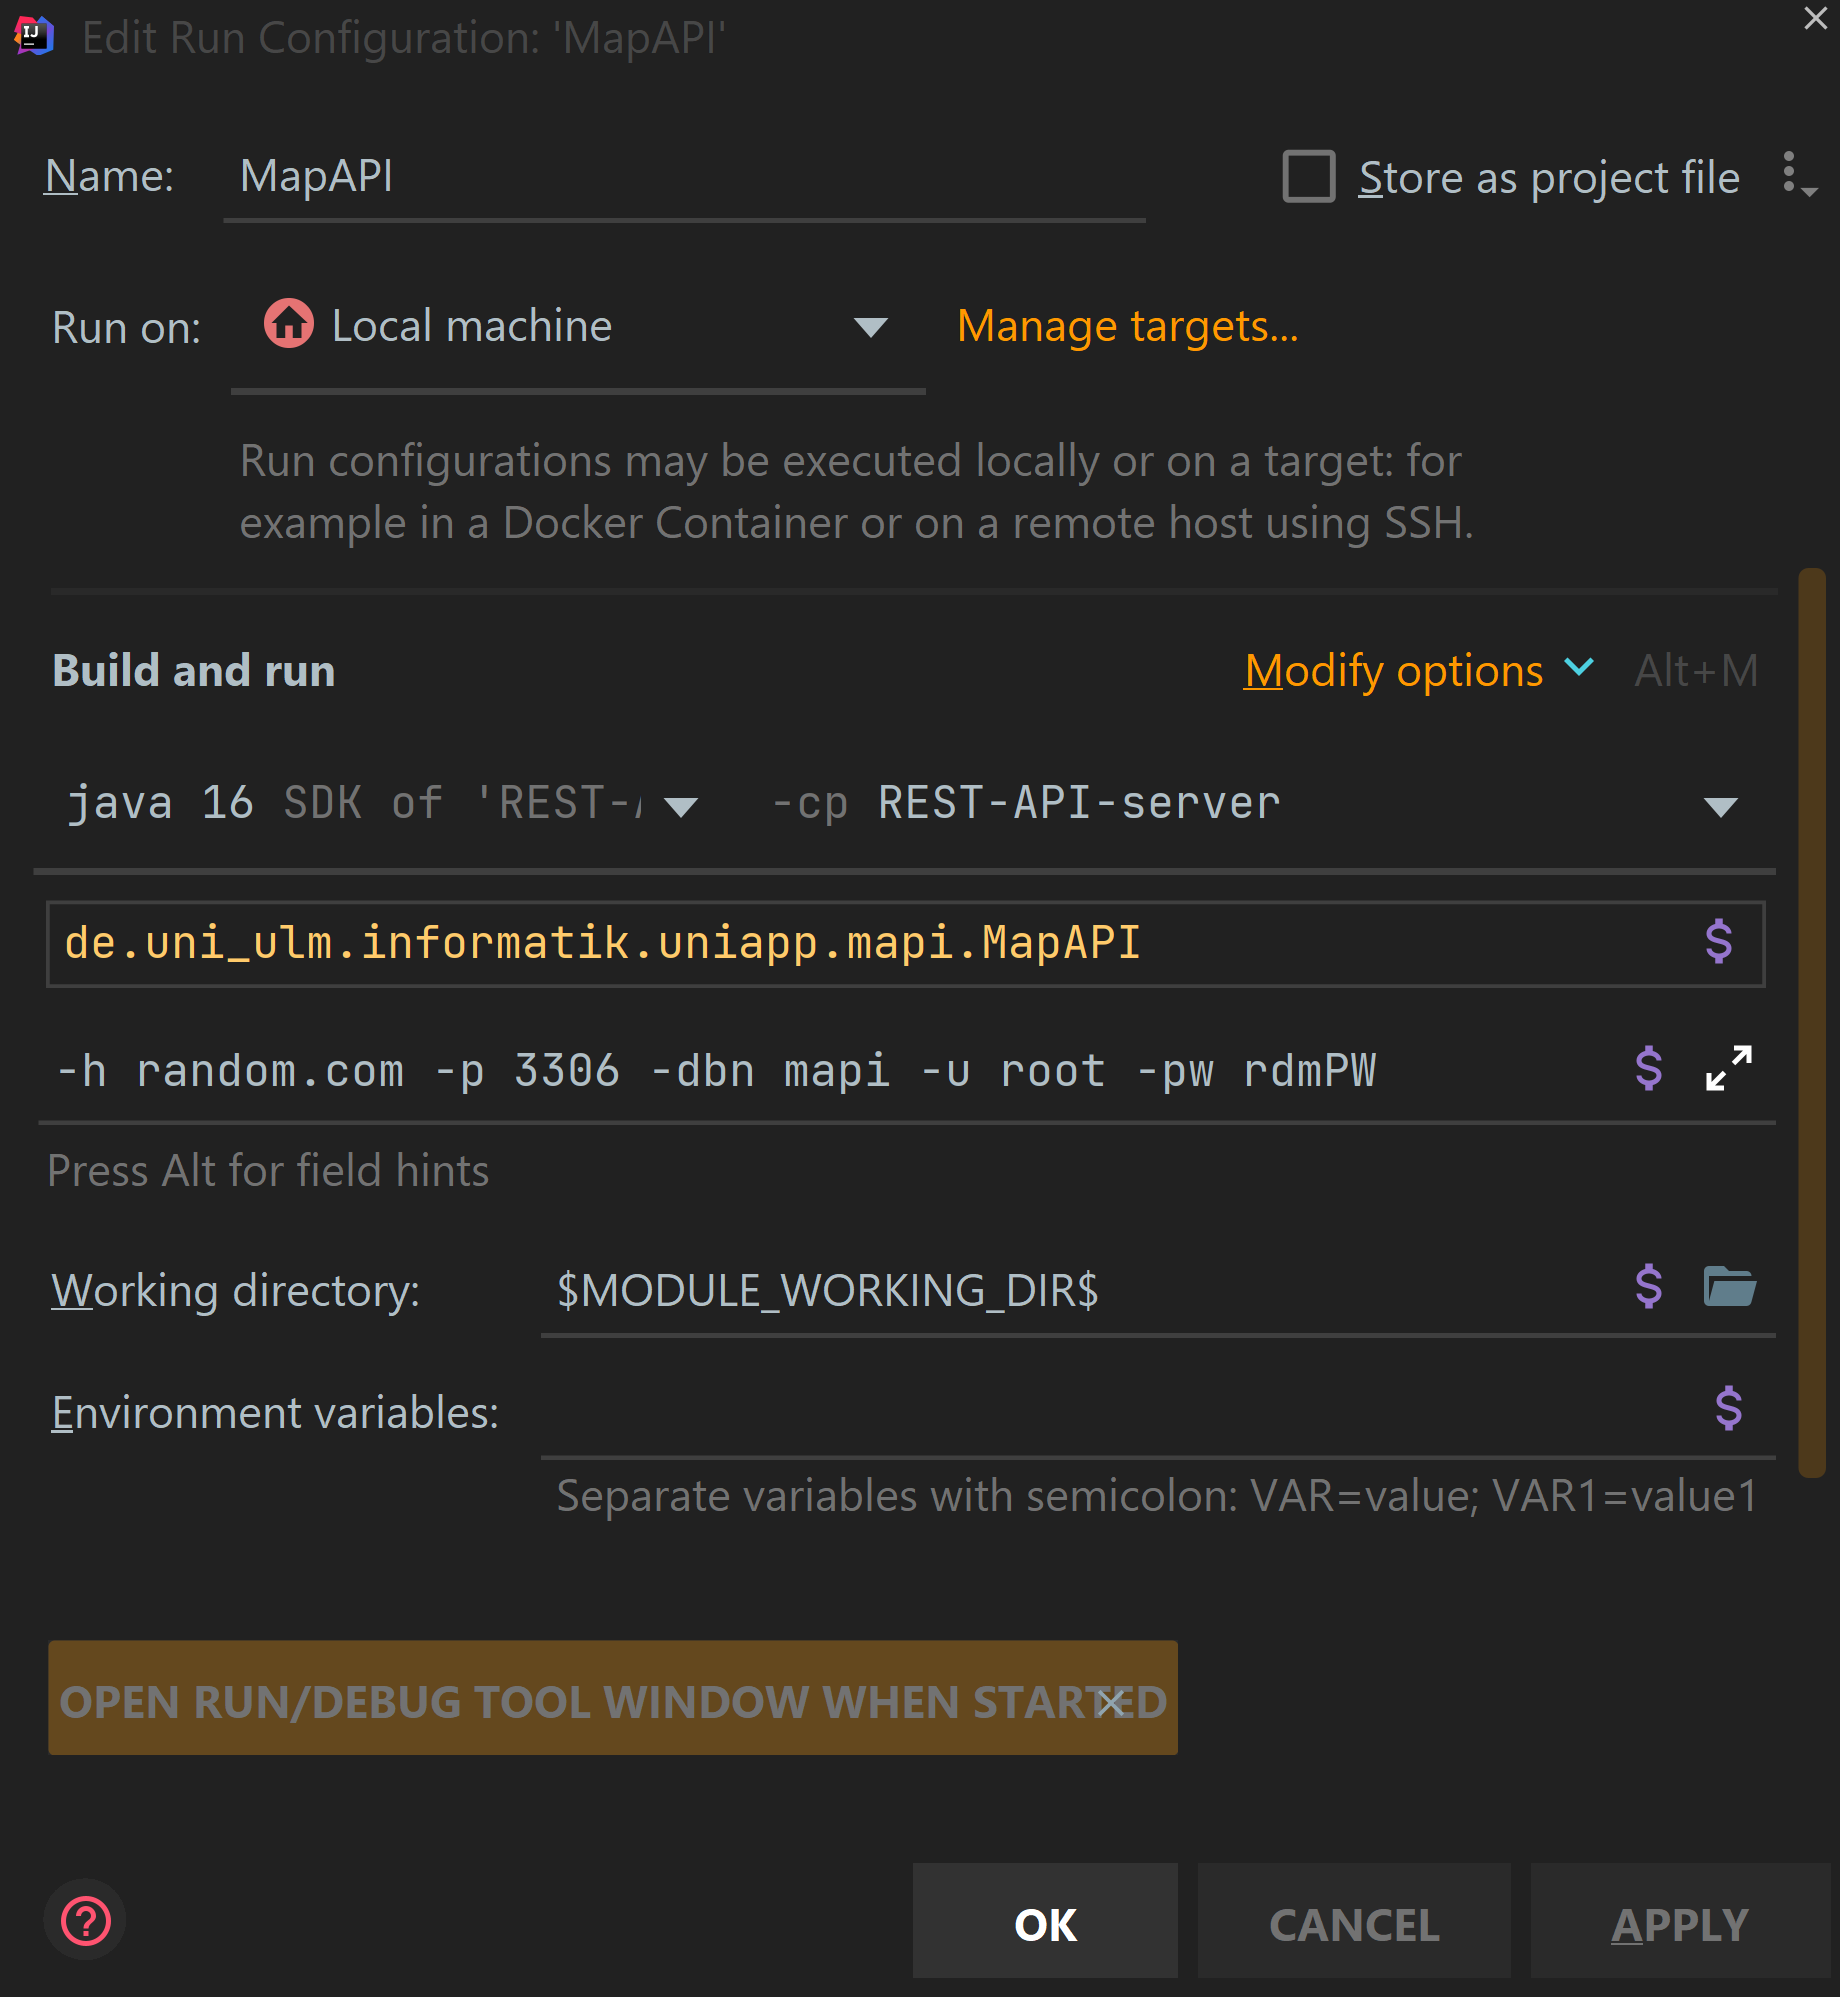
Then press OK to save the run configuration.
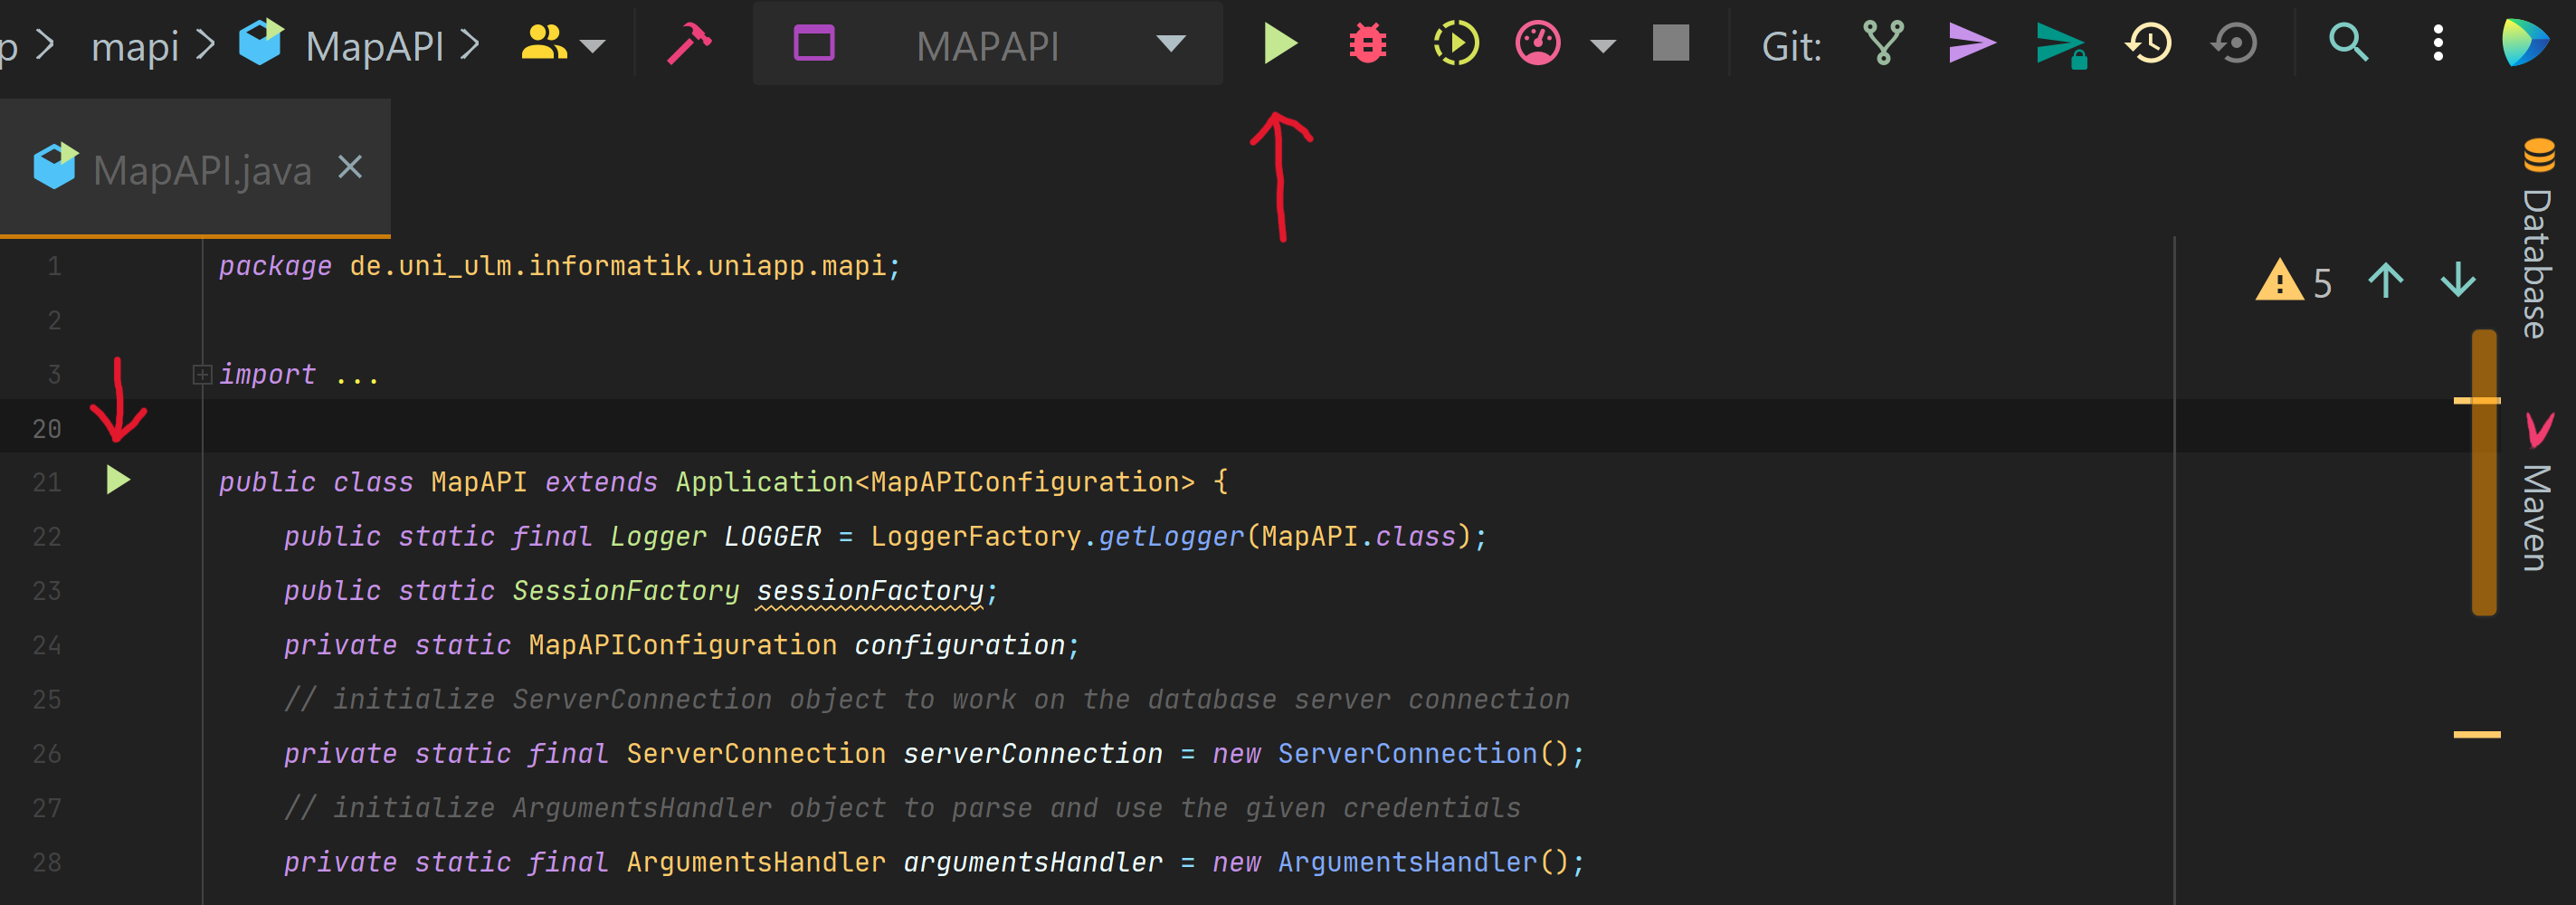
Then run the server. The red arrows show two possibilities how to run the server locally by clicking one of the green arrow buttons.
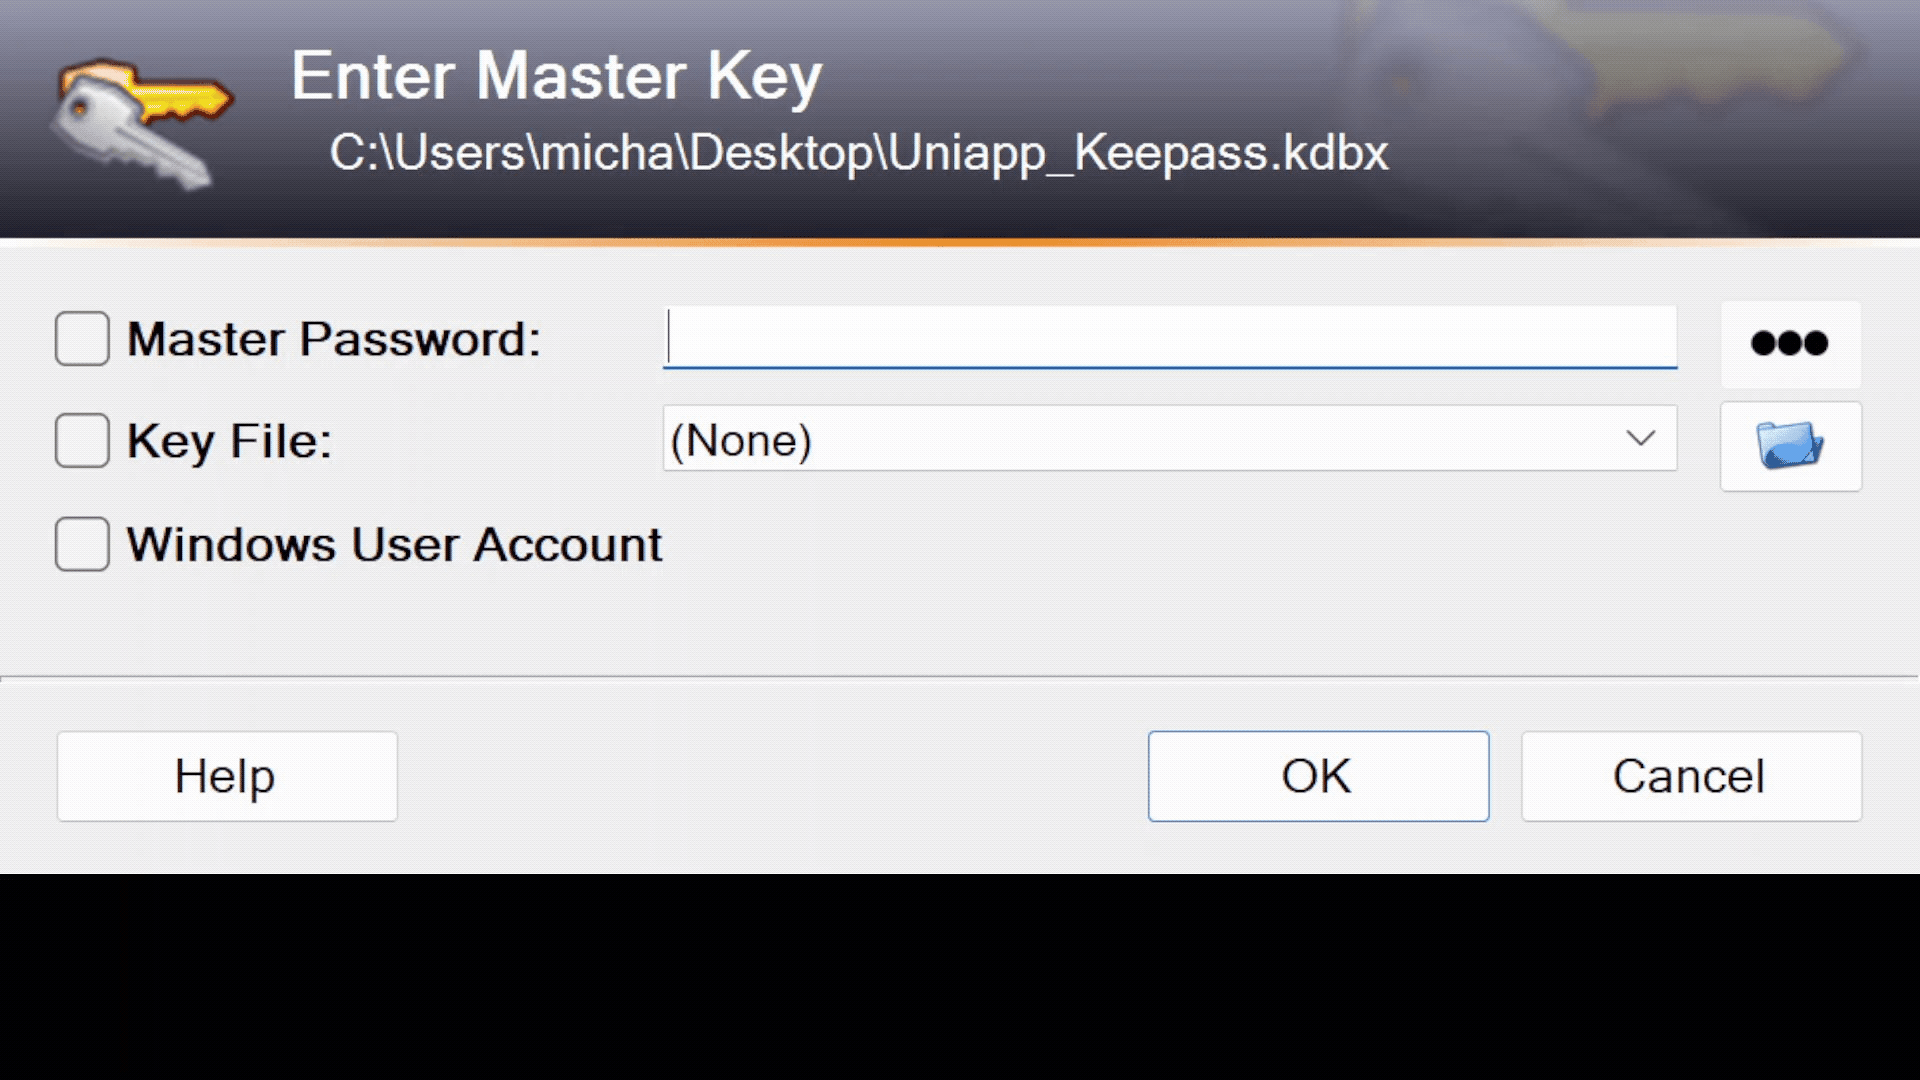
Download the UniApp-KeyPass file.
Open the KeyPass file. Ask Alexander Raschke for the password and enter it in the
Master Passwordsection. Continue with clicking theOKbutton.
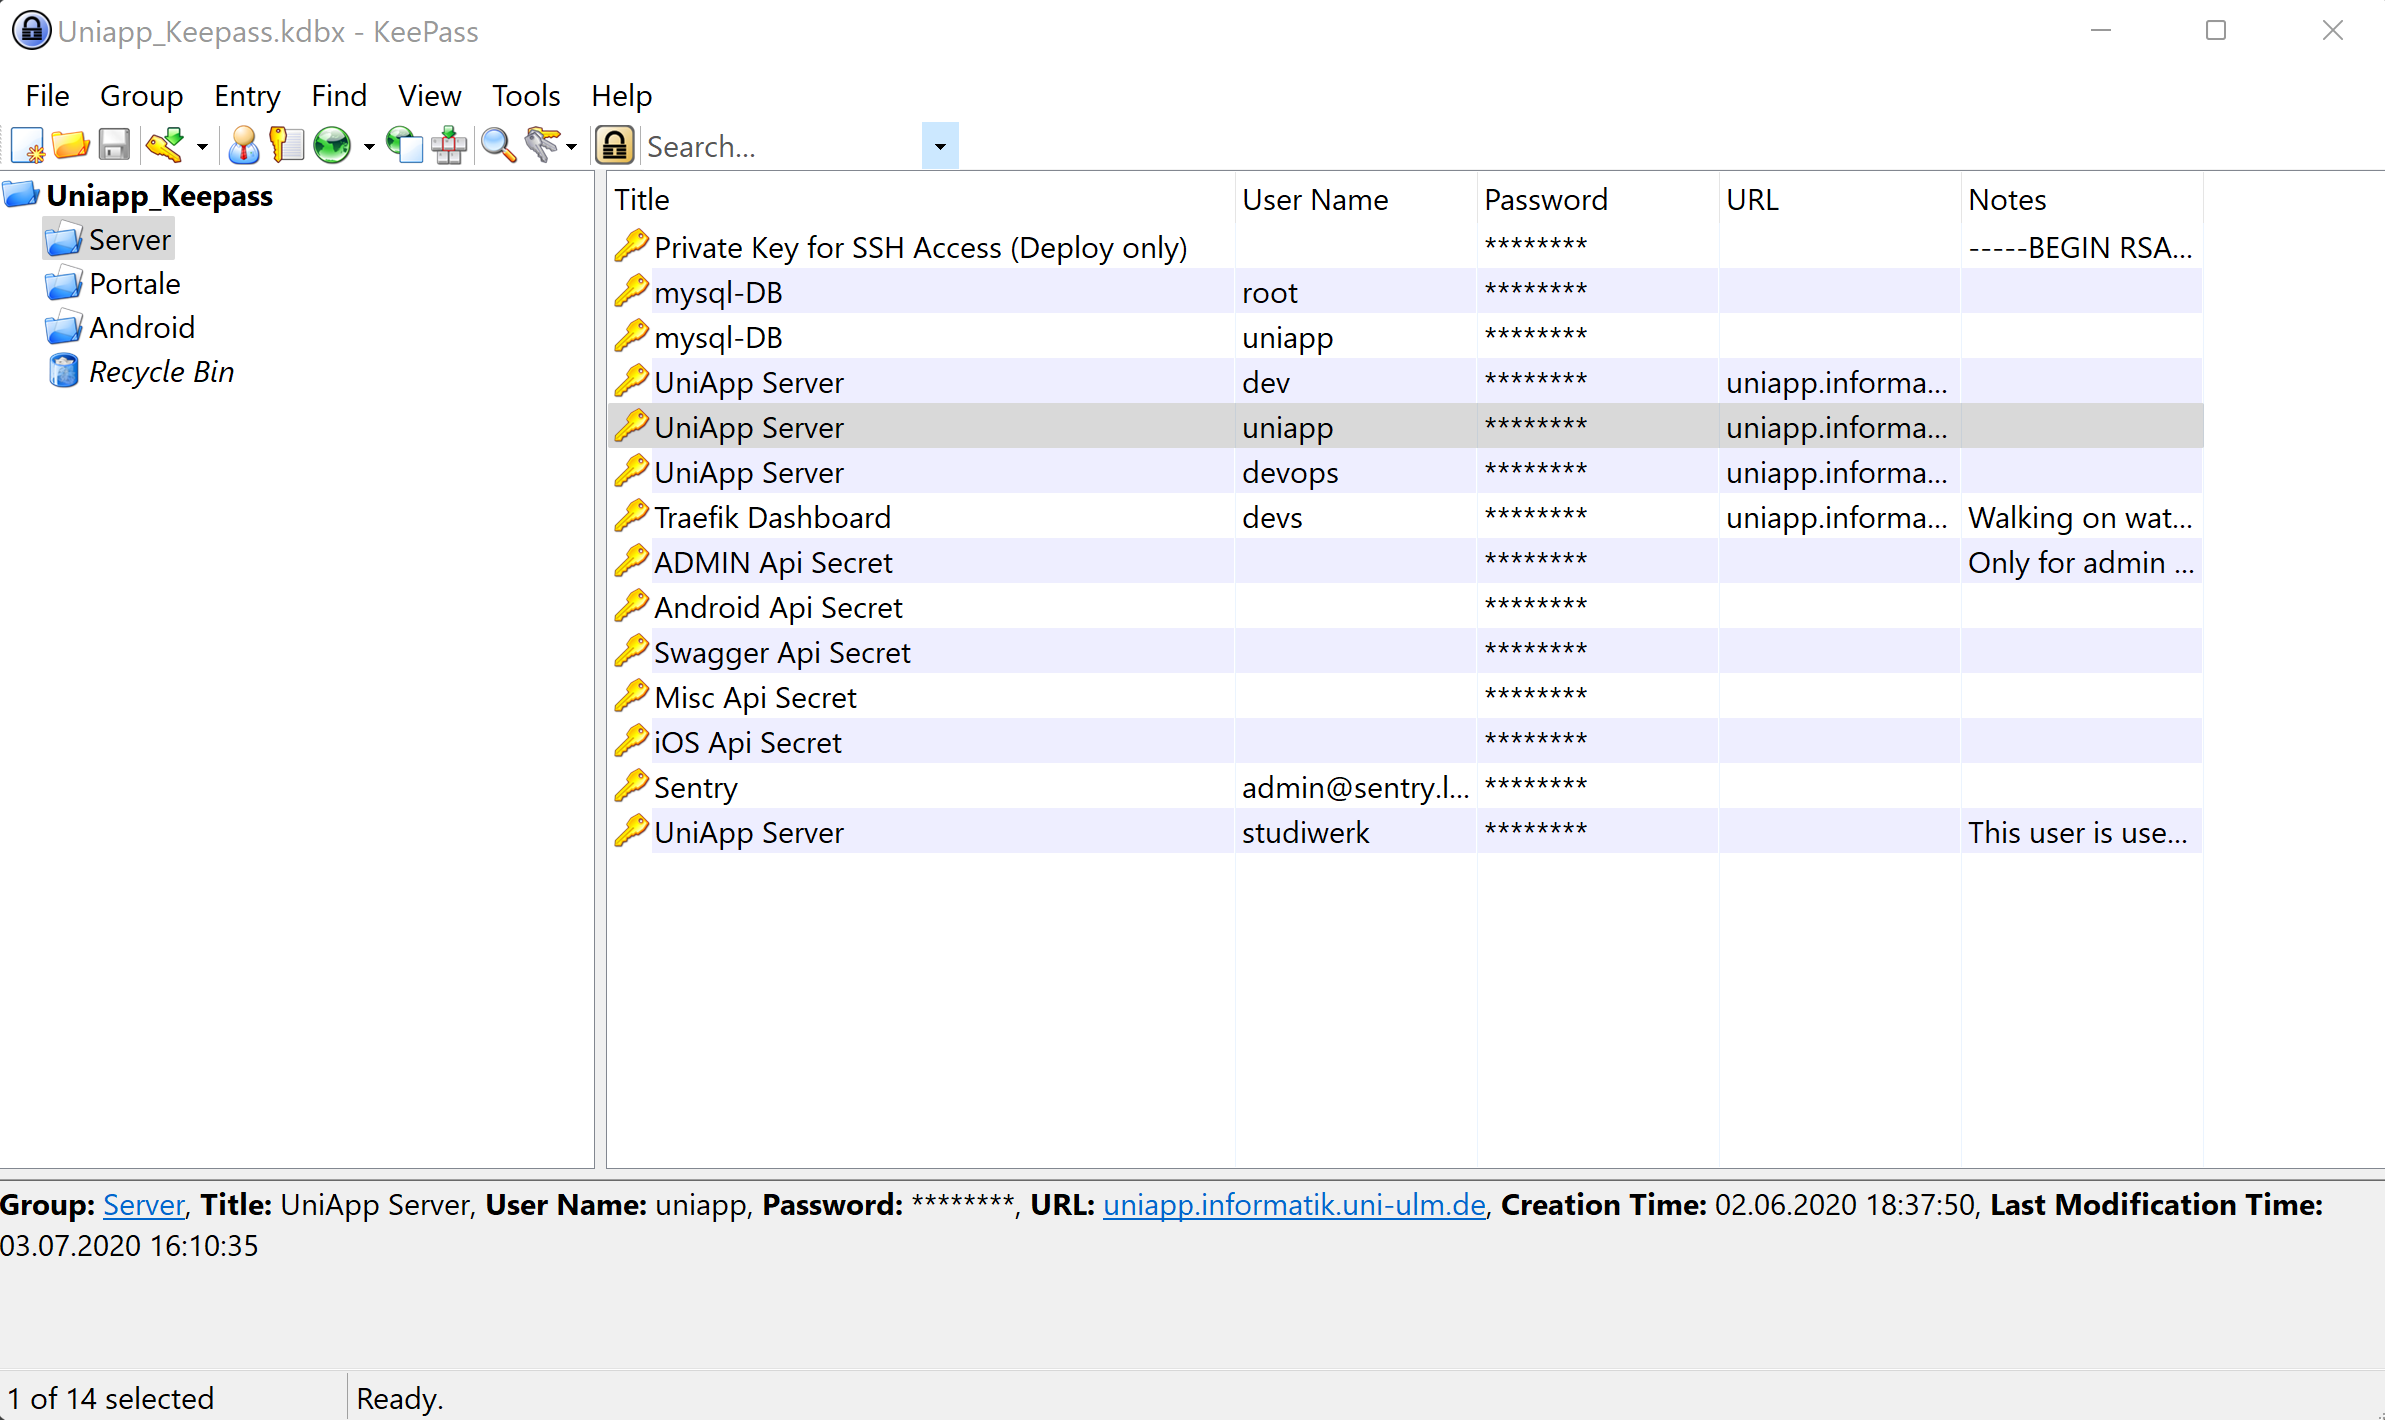
3. Select UniApp Server with username uniapp. Right-click it and click on Copy Password. It stores the password for 12 seconds to your clipboard.
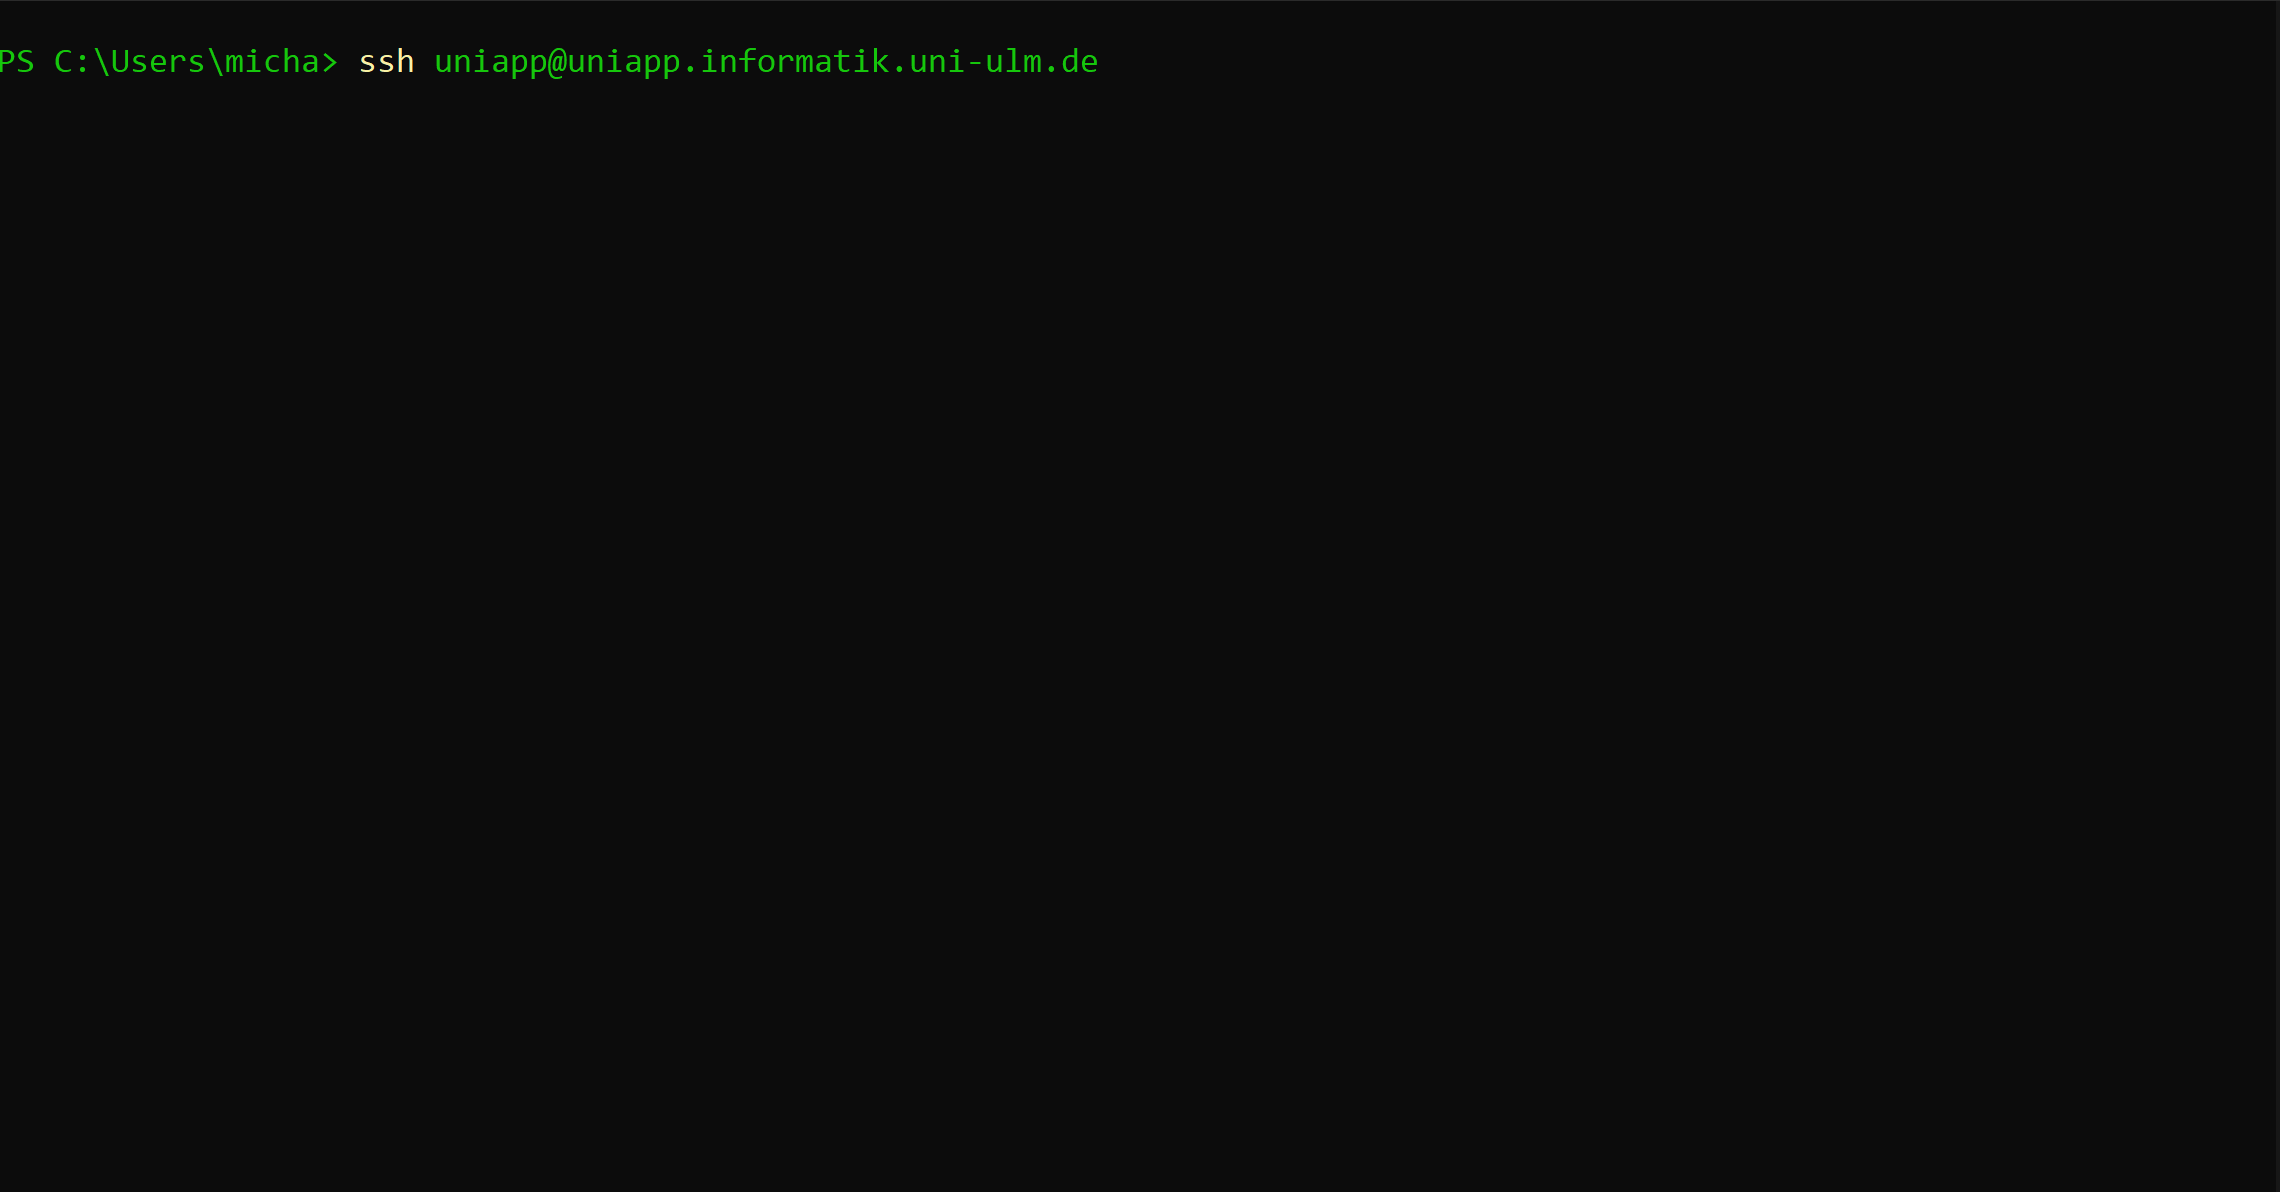
Select the url, username and password to log into the server with your shell using ssh.
Open your shell and type in
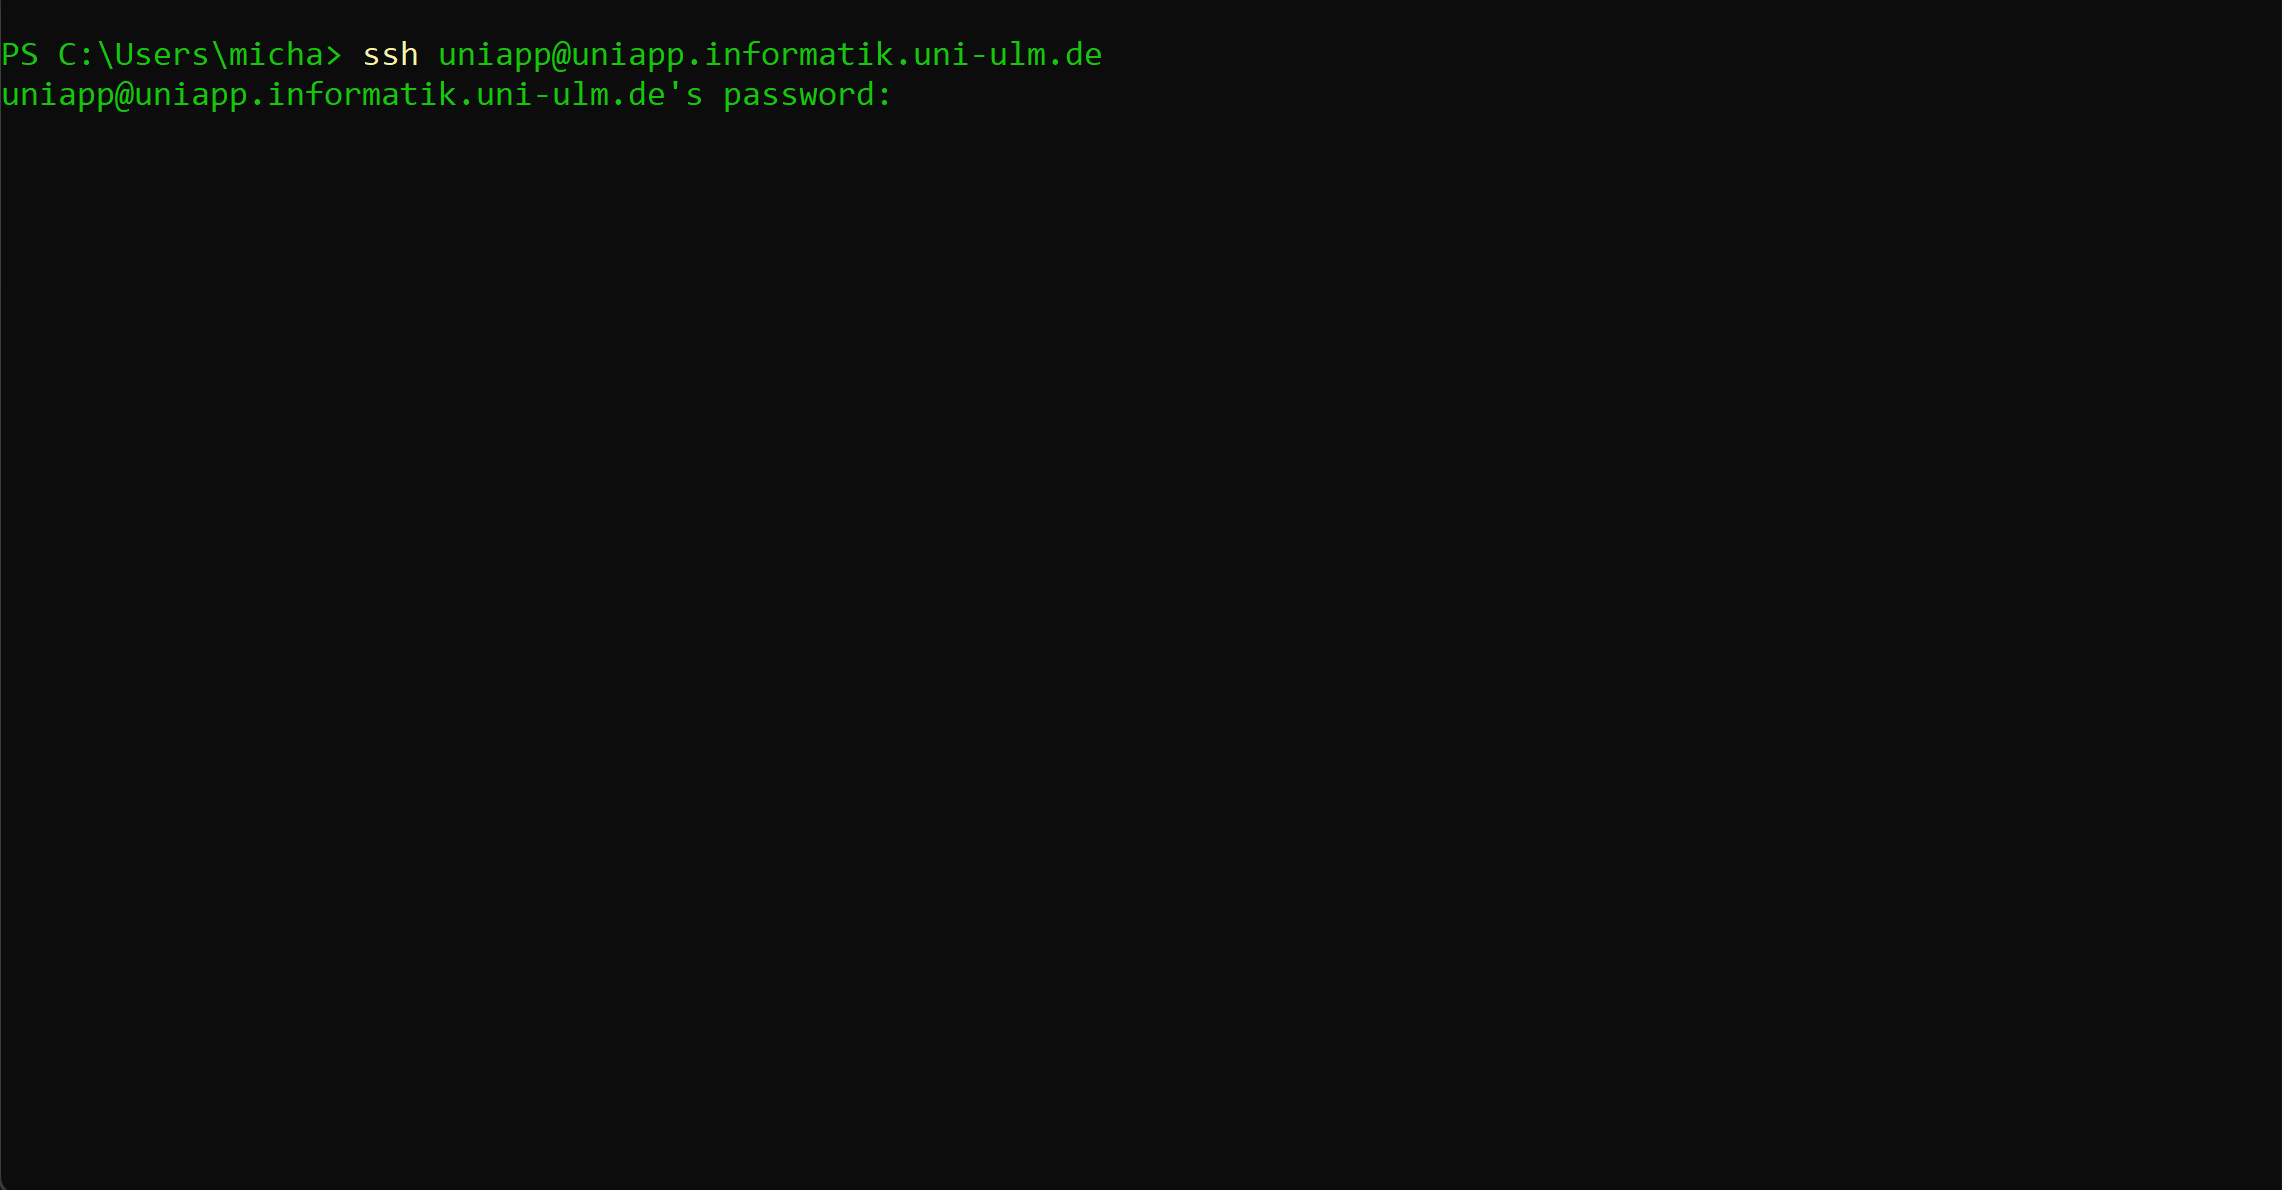
ssh uniapp@uniapp.informatik.uni-ulm.deand pressENTER.
Now enter the password and press
ENTERagain.
When logged in succesfully you can use all Linux commands that you need to achieve your goal. We will continue with docker commands we need to restart the docker server container.
Use the
docker pscommand to list all existing docker containers.

Choose the CONTAINER ID of the image with the release tag in it.
This is the docker container of the server that runs for the public.
Copy the CONTAINER ID of the image we need for further use.
Now to restart the docker container write
docker container {CONTAINER_ID}into your shell and pressENTER.

8. To see the logs of the docker container and to check if the server started successfully
just write docker logs {CONTAINER_ID} into your shell and press ENTER.

A successful server start looks like that:
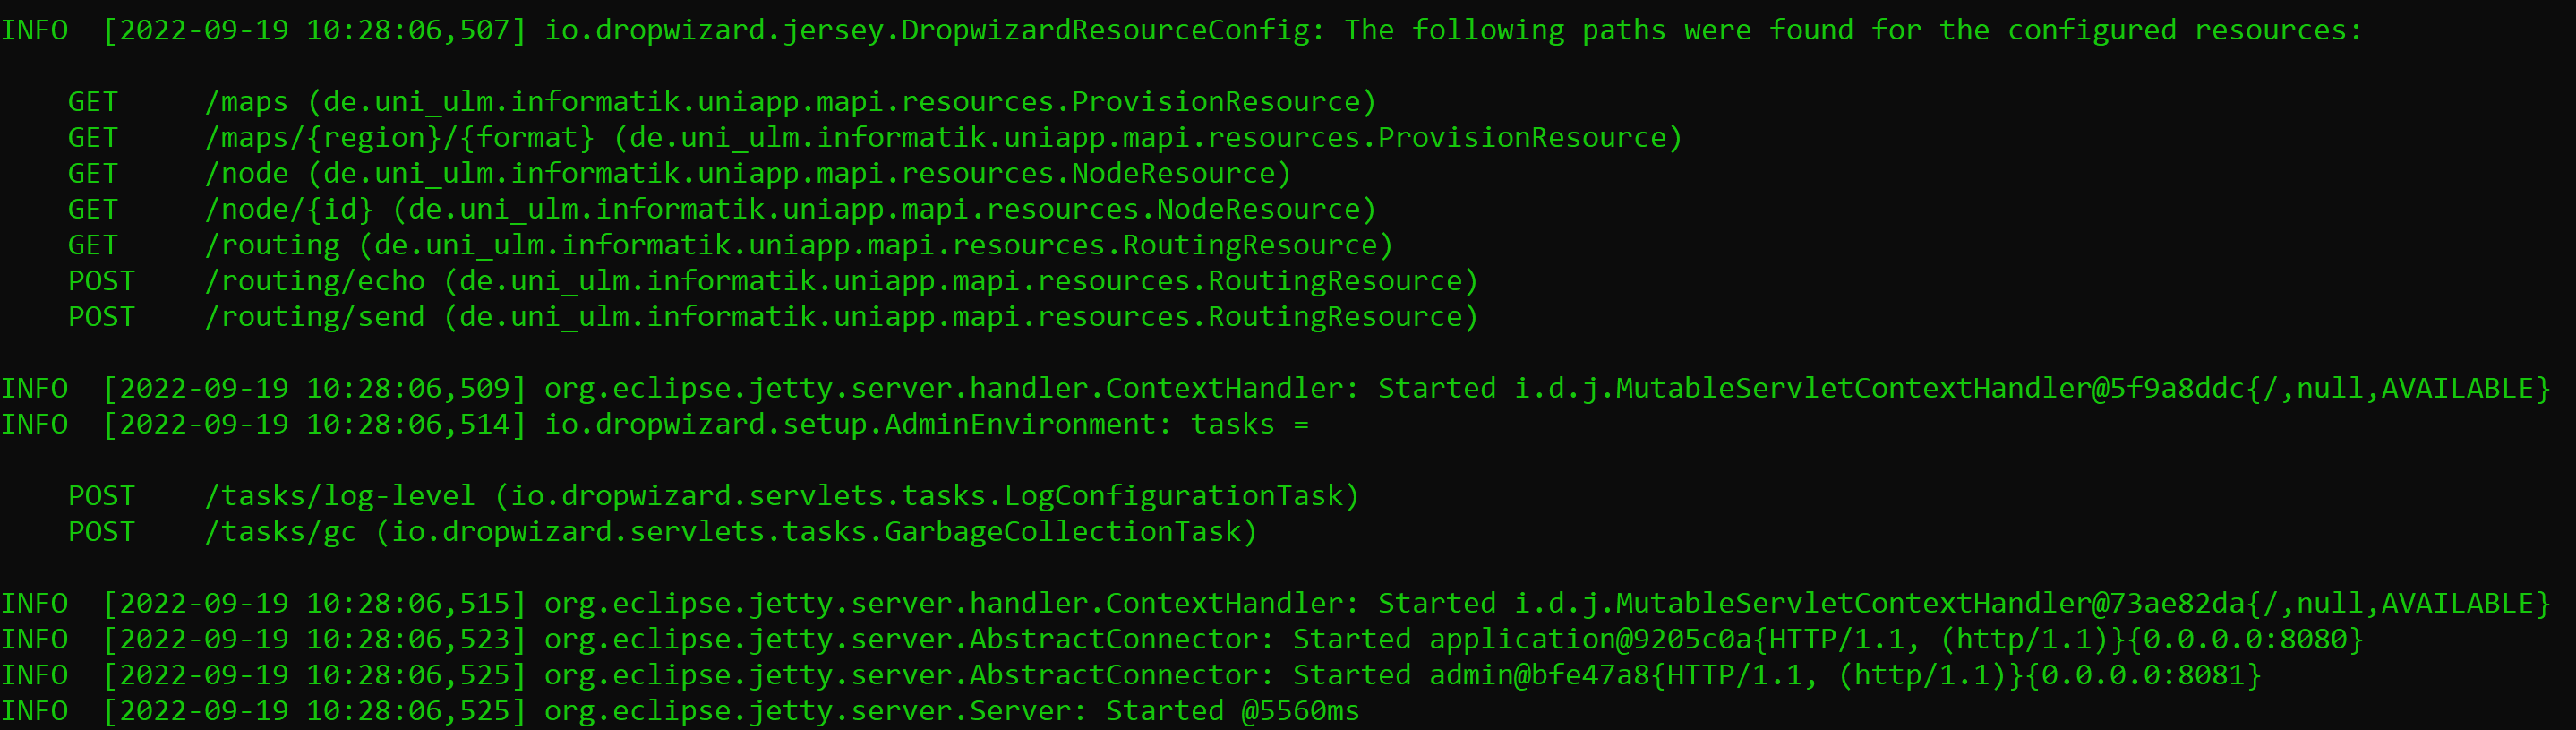
Here we can see the ressources that can be added to the existing url. For example it can look like that: https://uniapp.informatik.uni-ulm.de/mapi/v0/node/1. The last line of the server start shows that the server start was successful and tells how many milliseconds it needed. If the url of the server got called with a ressource we can see that in the logs with the corresponding status code.

The connecton between the Map REST server and the database server is implemented with JDBC. For setting up the connection it uses the nessary program arguments as described above. Everytime when working with the connection it checks whether there is an existing connection, if not it will initialize a new connection.
For navigation we use the GraphHopper framework for Java.
The dependencies we use can be found here.
Graphhopper doesn’t support multi-level support that is why we need to implement it.
This is done by splitting the route into smaller routes.
To get smaller routes the origin route will be split at stairways.
By having smaller routes for each level at the university campus we can easily initialize a GHRequest GraphHopper Request object which calculates the path for all routes.
The indoor navigation is not implemented right now. For the implementation data of the university campus is needed.
How to build JARs of the submodules?
If it is necessary to generate an executable JAR file of a submodule (Node Updater, Node Printer, or REST API server) for testing purposes this part of the documentation will guide you through this process.
Note
Please note, that this guide was performed and tested on the IntelliJ IDE. Thus, this process may be slightly different in other IDEs. However, since we are using the Maven build tool, this process will not be fundamentally different in other IDEs.
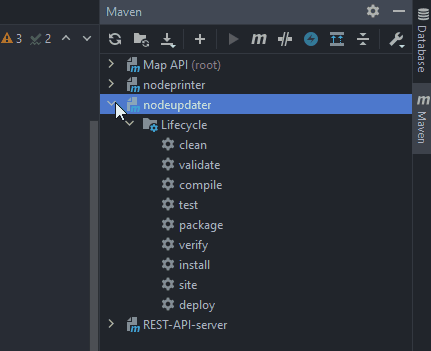
1. The MAPI project uses the Maven build tool, which is automatically detected by IntelliJ. For this reason, IntelliJ displays a Maven button on the right side. Please click on the Maven button to open it’s tool overview:
2. You will now see an overview with all existing Maven submodules (nodeprinter, nodeupdater, REST-API-server) and the parent Maven project (Map API (root)).
Please select a submodule whose JAR should be built. If you want to build all JARs of all submodules you can click on Map API (root). This guide shows how to build a JAR of the Node Updater:

3. You will now a enumeration of Maven’s Lifecycle actions. Please click on package:
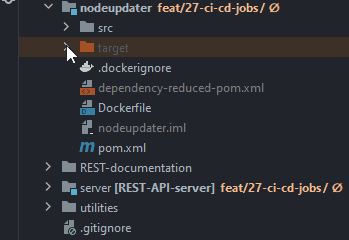
4. A new folder in the selected submodule, called target will appear. Please click on this folder to expand its contents:
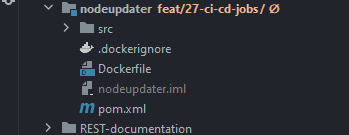
5. This newly created folder contains the built JAR file of your submodule:
Naming convention of the file name of the JAR
As you can see you can see several JAR files.
The file name without the .jar file extension you can see in the pom.xml file of the affected Maven submodule in the finalName-tag of the parent build-tag.
6. You can start your newly built JAR with this command on your machine:
java -jar yourJARsFileName.jar
Et voila - Have fun with your new jar file.
Attention
The JAR is created with the build tool Maven. For the JAR to be built successfully, Maven must be configured correctly. Usually, the project is configured correctly. If a configuration is required, this is done by pom.xml files of the corresponding modules. Please note that changing the pom.xml files may cause CI/CD pipelines to fail, as they also use Maven.
How to build Docker 🐬 images locally and test them?
Attention
The goal of this section isn’t to be complete. Furthermore, it is intended for a very quick introduction to Docker. Therefore, it should rather be understood as a crash course. There are a lot more concepts that you can’t find here and only in the official documentation.
Build Docker images and store them locally
It can be useful to create Docker images to test them locally before deploying them to a server. If you don’t know what Docker is, you can find more information on Docker’s official website . In short, Docker is software that allows you to isolate software in containers on an operating system.
Here it is very important to distinguish between the terms Docker Image and Docker Container. A Docker Image can be seen as a blueprint for an isolated application. A Docker Container, on the other hand, can be seen as a running instance of a Docker Image. There is no problem running a Docker Image in multiple Docker Containers.
A Docker image is stored locally in an image library. In short, a image library contains all created and downloaded Docker images of a user. Images can be obtained from different remote repositories. The best-known remote image library is probably Docker’s official Dockerhub. To create and build Docker images, the container virtualization software Docker is required. You can download it here. After installing Docker, you can start creating the image.
Attention
You must create the executable JAR before you start to build a Docker image. You can find more information in the previous section: How to build JARs of the submodules? The reason for this is that the JAR is loaded into an existing JDK image which executes it as you do on your local machine.
For that, open your command line in the folder where the desired submodule is located. Then enter the following command:
docker build -t <name of the image>:<tag of the image> .
Example: If you want to build a Docker image with the name nodeupdater and the tag v1.0 type the following command:
docker build -t nodeupdater:v1.0 .
Attention
Please do not forget the dot at the end. This indicates that the Dockerfile is located in the same folder where the shell is running.
Nice to know
The correct directory contains a Dockerfile. If you cannot find a Dockerfile, the image build folder is not correct and you will get error messages.
If you did not receive an error message, the Docker image is located in your local image library.
You can check that with the following command:
docker image ls
Run Docker images in a Docker container
To run your newly created Docker image just type in the following command in your shell:
docker run <name of image>:<tag of image>
Nice to know
Here you don’t need a dot at the end anymore.
This described command is minimal for running images. It makes sense to use options to customize the run of your container.
You may want to use the following options:
-dor--detachedfor running the container in the detached mode. This means that the container runs in the background.-p <rule>or--publish <rule>to set a firewall mapping rule in the firewall. For more information visit the official documentation about Container networking. Example:-p 80:8080maps the Docker host machine port 80 on the Docker container port 8080.--restart <flag>to set up a restart policy. The flagon-failurerestarts the container in case of an error. The flagalwaysalways restarts the container after it stops. If the container is stopped manually it should be started manually. If the Docker Daemon is restarted the container will also start automatically. Finally, the flagunless-stoppedis similar toalwayswith the exception that the container will be not restarted after it has been stopped.--name <container name>to set up a name for your new container. Otherwise, a random name will be chosen e.g. xenodochial_bassi.
The following command shows how to create a container of the image server with the latest tag.
Therefore we want to map the Docker host port 34322 to the Docker container port 24999.
The new container should restart itself but should not be restarted after it has been stopped.
The new container should be called runningserver.
To address the requirements of previous mentioned example we type in the following command:
docker run -d -p 34322:24999 --restart unless-stopped --name runningserver server:latest
You can list all containers and their status with the following command:
docker container ls --all
If you want to stop a container manually, type in the following command:
docker stop <container name>
If you want to start a stopped container, type in the following command:
docker start <container name>
If you want to delete a container type in the following command. Please note that the container must be stopped before you can delete it:
docker rm <container name>
Deployment of new server versions
Version types: dev, beta and release
Congratulations you have worked very hard on a new feature in the Map API and you want to deploy your fancy version on our server. But before we start with the actual deployment process, we have a quiet look into the three different versions which we are using in our project.
These three versions are:
- dev
The dev version is used to test the developed Map API very early. As the abbreviation dev, which is derived from the long word development, already says, this version of the REST API is only suitable for development. This version may contain errors and does not necessarily have to be complete. It should therefore only be used by developers.
- beta
The beta version is a preliminary version of the later release version. This version can be used by very few users in the apps who want to test the latest feature of the REST API first and to be able to share feedback based on it. The beta version can contain individual bugs.
- release
The release version is intended for the masses and the average user. This version should be almost error-free.
Version numbers
In our Map API project, we follow the semantic versioning scheme. You may have already seen version information like 2.0.32. This format follows a scheme that helps us to understand how different versions can be distinguished. In the following figure you can see the three different groups of a version number:

- revision
Describes little changes from the previous to the new version. These changes can be e.g. little bug fixes, refactorings, etc. An increase in the revision mostly does not imply the implementation of a new feature. The backward compatibility isn’t affected in this version increase.
- minor version
Describes the addition of new features in the new version. The backward compatibility is not affected in this new version.
- major version
Describes a new version that affects backward compatibility. It’s also known as the breaking change version.
Version numbers are read from left to right. To compare version numbers we take the first group (major version) first, then the second group (minor version), and finally the third group (revision).
An increased major indicates a breaking change. Backward compatibility is affected in this version.
An increased minor version indicates the implementation of a new feature that does not affect backward compatibility.
Finally, an increased revision indicates a fix of a bug without the implementation of a new feature. The backward compatibility is guaranteed here.
Some rules
x to x+1 the minor version and the revision number are changed to 0.x . y . z the new version number is x+1 . 0 . 0.y to y+1 the major version remains the same and the revision number is reset.x . y . z the new version number is x . y+1 . 0.z to z+1 the major and the minor version remains the same.x . y . z the new version number is x . y . z+1.In order to understand the scheme better, here are three fictitious examples:
A user test of version
1.4.56turned out that a very rarely NullPointerException is thrown in a certain constellation. We fixed this issue in the new version1.4.57.The version
1.4.57does not support the editing of certain user information. After hard work, we implemented this feature in the new version1.5.0.The version
1.5.0uses an old API and we implemented the new API in version2.0.0which isn’t compatible with the previous versions.
Deployment procedure
Now you know between which types of versions we differentiate and how the version number convention works.
It’s now your job to deploy your new version on our server.
We use the bwCloud instance uniapp for that.
If you are not familiar with the server structure in the UniApp project we recommend you to read the System Administration part of this documentation.
But don’t worry. The deployment process is very simple. We have worked hard on the automation of the deployment process in the whole UniApp project with very handy CI/CD scripts. If you don’t know what CI/CD is we recommend you to read the CI/CD part of this documentation. It’s not your job to maintain the servers but you should have a rough clue about the server structure. This is very useful if a server component fails.
Let’s talk about how new versions of your software are deployed:
Deployment of dev version
You want to test your API which you are currently working on and see if it works as expected? Then the dev version is the right choice for you. It’s very ugly if you must decide which useless version number to use for a quick and dirty test. These previously mentioned reasons have inspired us to make the deployment procedure very easy.
A simple merge of your working branch into the dev branch triggers the deployment process of the version you are currently working on.
Attention
Never use the dev version in production. Use it only for testing purposes in the development environment. Never use the release version for tests.
Deployment of beta version
You think your version is very stable but you are not sure enough if it is stable for the release. A beta version makes sense here. Interested users or developers can test this version and can submit feedback to you.
Just merge your current branch into the dev branch and then use a commit tag to indicate the beta version.
Your commit tag must correspond to the following regex scheme: ^v[0-9]+\.[0-9]+\.[0-9]+-beta(\.[0-9]+)?$
v1.0.1-beta, v1.0.1-beta.1, v14.1454.1014-betav1.0-beta. 1.0.4-beta, v1.0.0Tip for Regular Expressions (regex)
Regular Expressions can be very complex to understand. If you are not sure whether a string follows a defined regex you can use this useful website for validating strings against regex schemes: https://www.regexe.de/
Deployment of release version
After a lot of tests, you are sure that the current version is very stable and suitable to be the new candidate for the dev version which expands the feature set to our users. It’s time to publish your new API version for all users.
Just merge your current branch into the dev branch and then use a commit tag to indicate the release version.
Your commit tag must correspond to the following regex scheme: ^v[0-9]+\.[0-9]+\.[0-9]+-release$
v1.0.1-release, v14.1454.1014-releasev1.0-release. 1.0.4-release.1, v1.0.0After some minutes you must confirm the deployment of the new production version.
You can confirm the deployment in GitLab as shown below:
Click on
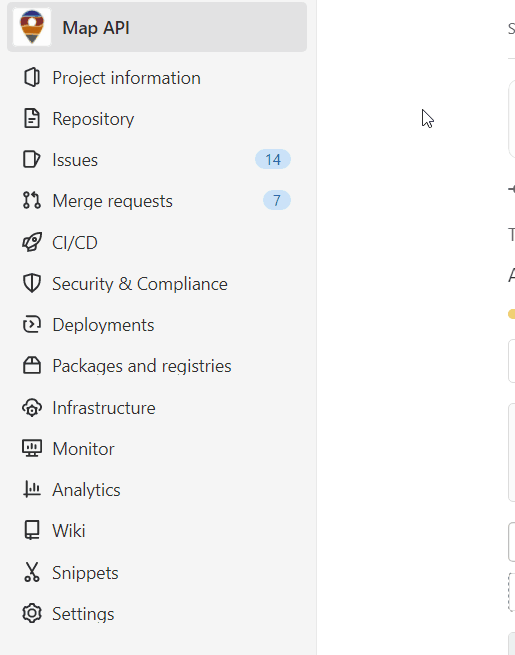
CI/CD > Pipelinesin the Map API project:
Now you can see an overview of all pipelines of the project. There is a gear wheel symbol which symbolizes that additional user action is needed. Click on it:

Now you can see an overview of the affected pipeline. Please click on the play button of the
prepareDeployjob:

Congratulations! You have successfully triggered the deployment job of the production pipeline manually. Please wait a moment and have fun with your new version.
Nice to know: Stop the production server
You can also stop the running Docker container on the remote server which contains the production server.
Just repeat the steps 1. - 3. and click on the play button of the stopProd job.
Attention
If you deploy a new release version you must merge the dev branch into the main branch without deleting the source branch.
The reason for this is that the main branch contains the history of all release versions.
For further information about branching conventions, see the handy cheatsheet.
Quickstart: How to commit with tags in IntelliJ
What’s a tag?
A tag represents a snapshot of a particular branch. It is commonly used to mark particular versions in the Git repository.
This quickstart guide will describe how to commit with tags in IntelliJ:
Work on your work branch commit your changes and merge them into the dev branch.
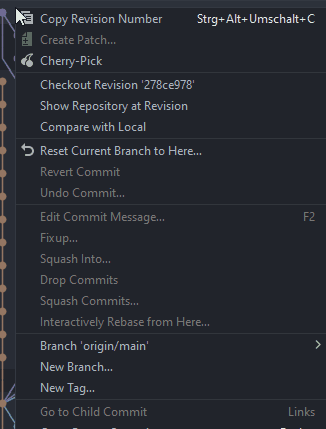
Select the merge commit in your IntelliJ Git history and make a right-click on the entry. Then select
New Tag...in the context menu:
Fill in your version in the new dialog and then press
OK:
Open the dialog to push your changes. Please click on the
Push tagscheckbox and push your changes:

Congratulations - You can relax now and see how the pipeline does the work for you. 😎
Oh crap 😢: You forgot the tag - What to do?
That’s no problem. After you have pushed the changes you can add a tag afterward. Just create a new tag as described above in steps 2 and 3. Then start the Git bash in your project root. Type in the following command:
git push tags --all