Corporate Videos
Since we learn a lot of dificult stuff during our studies, one soft skill is somehow often hidden. This soft skill is communication. The smartest and most brilliant solutions for hard problems are worthless, if nobody understands them and they cannot be explained to anybody else. Let’s have a look on following quote:
“Science is not finished until it is communicated.” – Mark Walport
Not only, does this apply for scientific context but also for the business and public relation context. Imagine to implement one of the best softwares in the world, but you are not able to sell it to customers or investors. This feels like having a box filled with gold but neither beeing able to open it nor to show the gold to others.
Nowadays, videos are one of the most used simple and wide spreadable communication mediums. And during the Software Engineering Project you will most likely create up to 2 videos - the intermediate presentation and the final presentation. Therefore, we will introduce you to video production process and offer hints and advice for creating a good quality video.
We will start with the production process and an explanation of each step and task during the process. The next topic shows an overview about different ideas or “styles” of videos. Last but not least, we highlight some aspects of videos from the Winter Semester 2020/21 that worked well, but also some points which should be avoided.
The Video Production Process
In this section, we will show you how to start a new video project following the video production process. The process consists of 3 steps. The steps are preproduction, production, and postproduction. Each step owns a set of specific tasks targetting good quality videos as result. A good quality video does not only have good video/image and sound quality but also must transmit the aimed message in a powerful way.
Preproduction
Preproduction is all about planning, coordinating and preparation of all following steps. Considering these aspecets, preproduction is the fundament of a high quality video.
The first task for planning is the estimation of a strategy. The strategy contains all information about the topic, the goals for a video and further more. As following, we will explain each task for an exemplary project. Each project starts with an idea. From the idea, we create a strategy, plan a schedule and search additional material. The more information we gain in the first step, the less work is required to do while postproduction.
The Strategy
The strategy is a collection of several documents and describes the central aspects of the video. Therefore, start by describing the goal of your project. For example, to advertise a new app. After you determine the goal - respectively the message - of your project, you should make yourself aware of your audience. The audience are all groups targeted by the message of your project. This step determines whether multiple videos or other mediums must be used to address each group in a proper way. However, try to address your whole audience with a single video.
Now, that you know the context of your project, conduct a research on the matter of the video. In our case, that could be either some development techniques for the intermediate presentation, or aspects of features of the app for the final presentation. After research, plan a meeting to brainstorm ideas and concepts for the video. It is neither essential to be detailed nor to create a matured idea during this task.
When you are done with brainstorming, select a specific idea. Afterwards, develop a script in which you refine the selected idea. The script describes the story of the video. The story contains the spoken text, characters, actions, locations and the order of scenes. Sometimes, not all of these aspects are required since this strongly depends on the type video you try to create. The script helps to estimate and schedule open tasks, while giving a roadmap for each team member. A template for an exemplary video script can be found here.
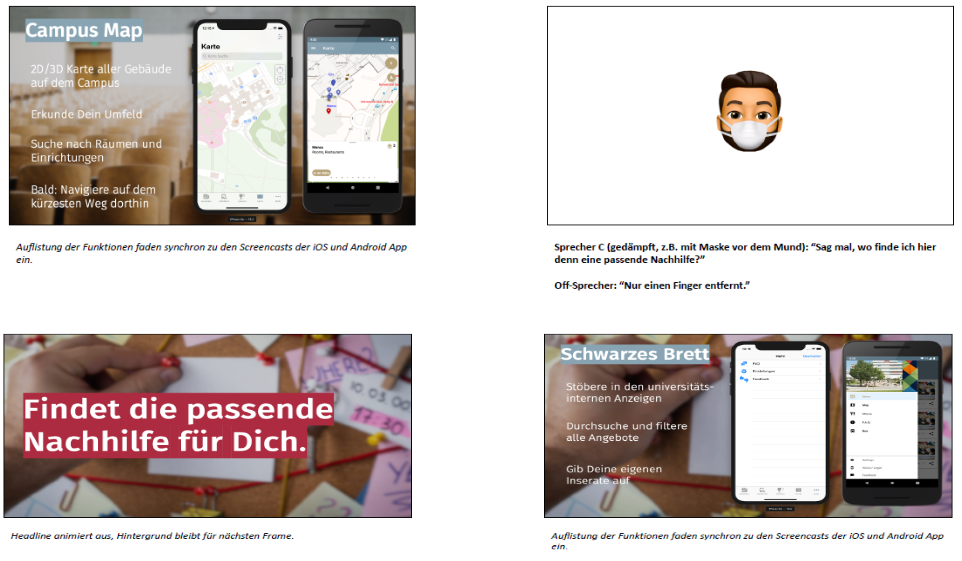
Example of a story board page
The next task is to derive a story board from the script. A story board describes some certain scenes of the script in a more visual way. Therefore, select the scene you want to visualize. Draw the final video shot and add the related spoken text, action or music to the sketch. It’s not important to create super detailed or colorized sketches. Rough sketches are totally fine as long as their content gets clear.
Such content is:
the order of the sketches clarifies the plot of the scene
the atmosphere of the scene is conveyed
actions and emotions of characters/persons are grasped
the location is clarified
day time and season are clarified
perspectives and camera settings are clarified
It is not necessary to determine all of these criteria on every scene, sometimes it is not necessary to know about the time aspects, e.g. when inserting a graph or exemplary image to visualize something. But it is central to create awareness for the goal of each visualized scene. The story board creates a vision for the overall project and can be treated as a matured roadmap of certain scenes for recording and postproduction.
When creating a story board, usually 4 to 6 sketches are collected on a page. The sketches are drawn into small frames. Addtionally add meta information, such as location, characters and spoken text to each frame. A small but beautiful example for sketches and a story board can be found here.
The last part of the strategy is to plan the resources for the following step - recording. You should determine the resources of your team. For example, who owns a good audio record set or a good quality camera for shooting. Or whether you need to organize something to use a certain location or to meet each other.
The Schedule
The schedule contains all left tasks which must be accomplished to finish the project and their respective deadlines. Such tasks are recordings of a scene or voice overs, making picures or other simple tasks of the following steps.

Initially, all open tasks should be collect. Therefore, use the script and the story board. But also plan for tasks of postproduction, such as logging material and arranging the footage. Also organizing a location or equipment should be considered. You can also brainstorm to find unconsidered tasks. Then, determine a person in charge for each task on the finalized list.
Hint
Before selecting persons in charge, make sure that they have access to the equipment they need. Example: A person in charge for a voice over should have access to a microphone recording in a good audio quality without much background noise.
Other criteria for assigning tasks are:
environment for recording
distance to recording locations
voice acting
acting talent
free time
We do not recommend to exclude motivated team members from a task, just because they do not have the best equipment for that particular job. Instead, try to provide the necessary equipment for them. The objective of video projects in our context is to learn about good means of communicating and to apply these practically in a video.
Once you have finished collecting tasks, you should determine a time schedule. The time schedule estimates deadlines for each task and should reflect dependencies between each task. Such dependencies can be some equipment which is needed in multiple tasks (e.g., a video camera), location dependencies (e.g., weather, rentals, free time of actors). Do not be afraid to start with a rough estimation and refine it step by step.
Additional Material
There is not only recorded material in a video. Most of the times, background music or images are used in videos to emphasize the emotion or the story. The earlier you prepare such kind of material in advance, the more comfortable is your work during postproduction.
This task can take a lot of time, since there are billions of tracks in the universe of music. However, we should avoid using commercial tracks to prevent copyright infringements. Therefore, we provided a list of recommended sources and a short section about licenses in this section.
Attention
Disclaimer
We reference many third-party platforms for resources in this subsection. Please note, that we do not guarantee full-correctness of our listings. Each sources’ licensing models are documented to a given timestamp to the best of our knowledge. As a consequence, there can be changes to the licensing model of certain sources which are not mentioned here. In such a case, we would appreciate a short notification.
Typical media used in video production is audio or graphical resources. For the first one, we consider background tracks and sound effects as most relevant types. For the latter, we consider pictures, mockups, and icons as most relevant resources in regard to our context.
Source |
Licenses |
Updated at |
Notes |
|---|---|---|---|
public domain & various Creative Commons |
2020-10-20 |
||
Mostly CC BY |
2020-10-20 |
||
royalty-free |
2020-10-20 |
||
CC BY |
2020-10-20 |
if you are unsure, send email and explain use case. For more information, refer to this article in the knowledge. |
|
2020-10-20 |
|||
CC BY |
2020-10-20 |
||
public domain |
2020-10-20 |
small set of tracks |
|
Unchecked |
|||
Unchecked |
|||
CC BY |
2020-10-20 |
||
royalty-free |
2020-10-20 |
low prices & sales |
Source |
Licenses |
Updated at |
Notes |
|---|---|---|---|
CC BY |
2020-10-20 |
||
2020-10-20 |
free for educational projects |
||
CC0 (Free),
~ CC BY (Standard)
|
2020-10-20 |
||
CC BY 3.0, public domain |
2020-10-20 |
||
Creative Commons |
2020-10-20 |
Source |
Licenses |
Updated at |
Notes |
|---|---|---|---|
public domain |
2020-10-20 |
||
public domain |
2020-10-20 |
||
Unchecked |
2020-10-20 |
Source |
Licenses |
Updated at |
Notes |
|---|---|---|---|
2020-10-20 |
Look for the picture description. Often he allows free use. |
||
2020-10-20 |
The stuff you find on his portfolio page is free to use with a link back to his page. |
Source |
Licenses |
Updated at |
Notes |
|---|---|---|---|
Mostly CC BY |
2020-10-20 |
Legal Considerations
There are lot of resources that are required for video production. There are background images, icons, pictures, frames (i.e. of devices), videos, music tracks, voice recordings, and more. But there is a point in which all have the same restrictions. This point is copyright law. You have to check whether you are allowed to use resources before you use them. In best case, let someone else verify your opinion on a source if it is not under public domain or a similar license.
In best case, the resources are available under following licenses:
There are also licenses which enable you to use the resource for free but reqire credits to the original author. Some of these licenses are:
CC BY
CC BY-ND (no derivatives)
royalty-free
Important
Royalty-free means that there might be an initial price which you need to pay, but there are no regularly royalties for the time of usage. Thus, royalty-free does not automatically mean that material is freely available in contrast to public domain material. Furthermore, pages for ‘royalty-free’ material offer some free tracks. But be careful on choosing tracks on these pages.
Production
Production means the actual recording of the video and audio resources. To run easily through that step, the fundamentals from preproduction are used. The script and the story board are used to answer the “What?”, “Who?” (actors/characters/voice artists) and “How?” while the schedule answers “Who?” (the responsible), “When?”, and “How long?”. The latter also determines the overall length of the production step.
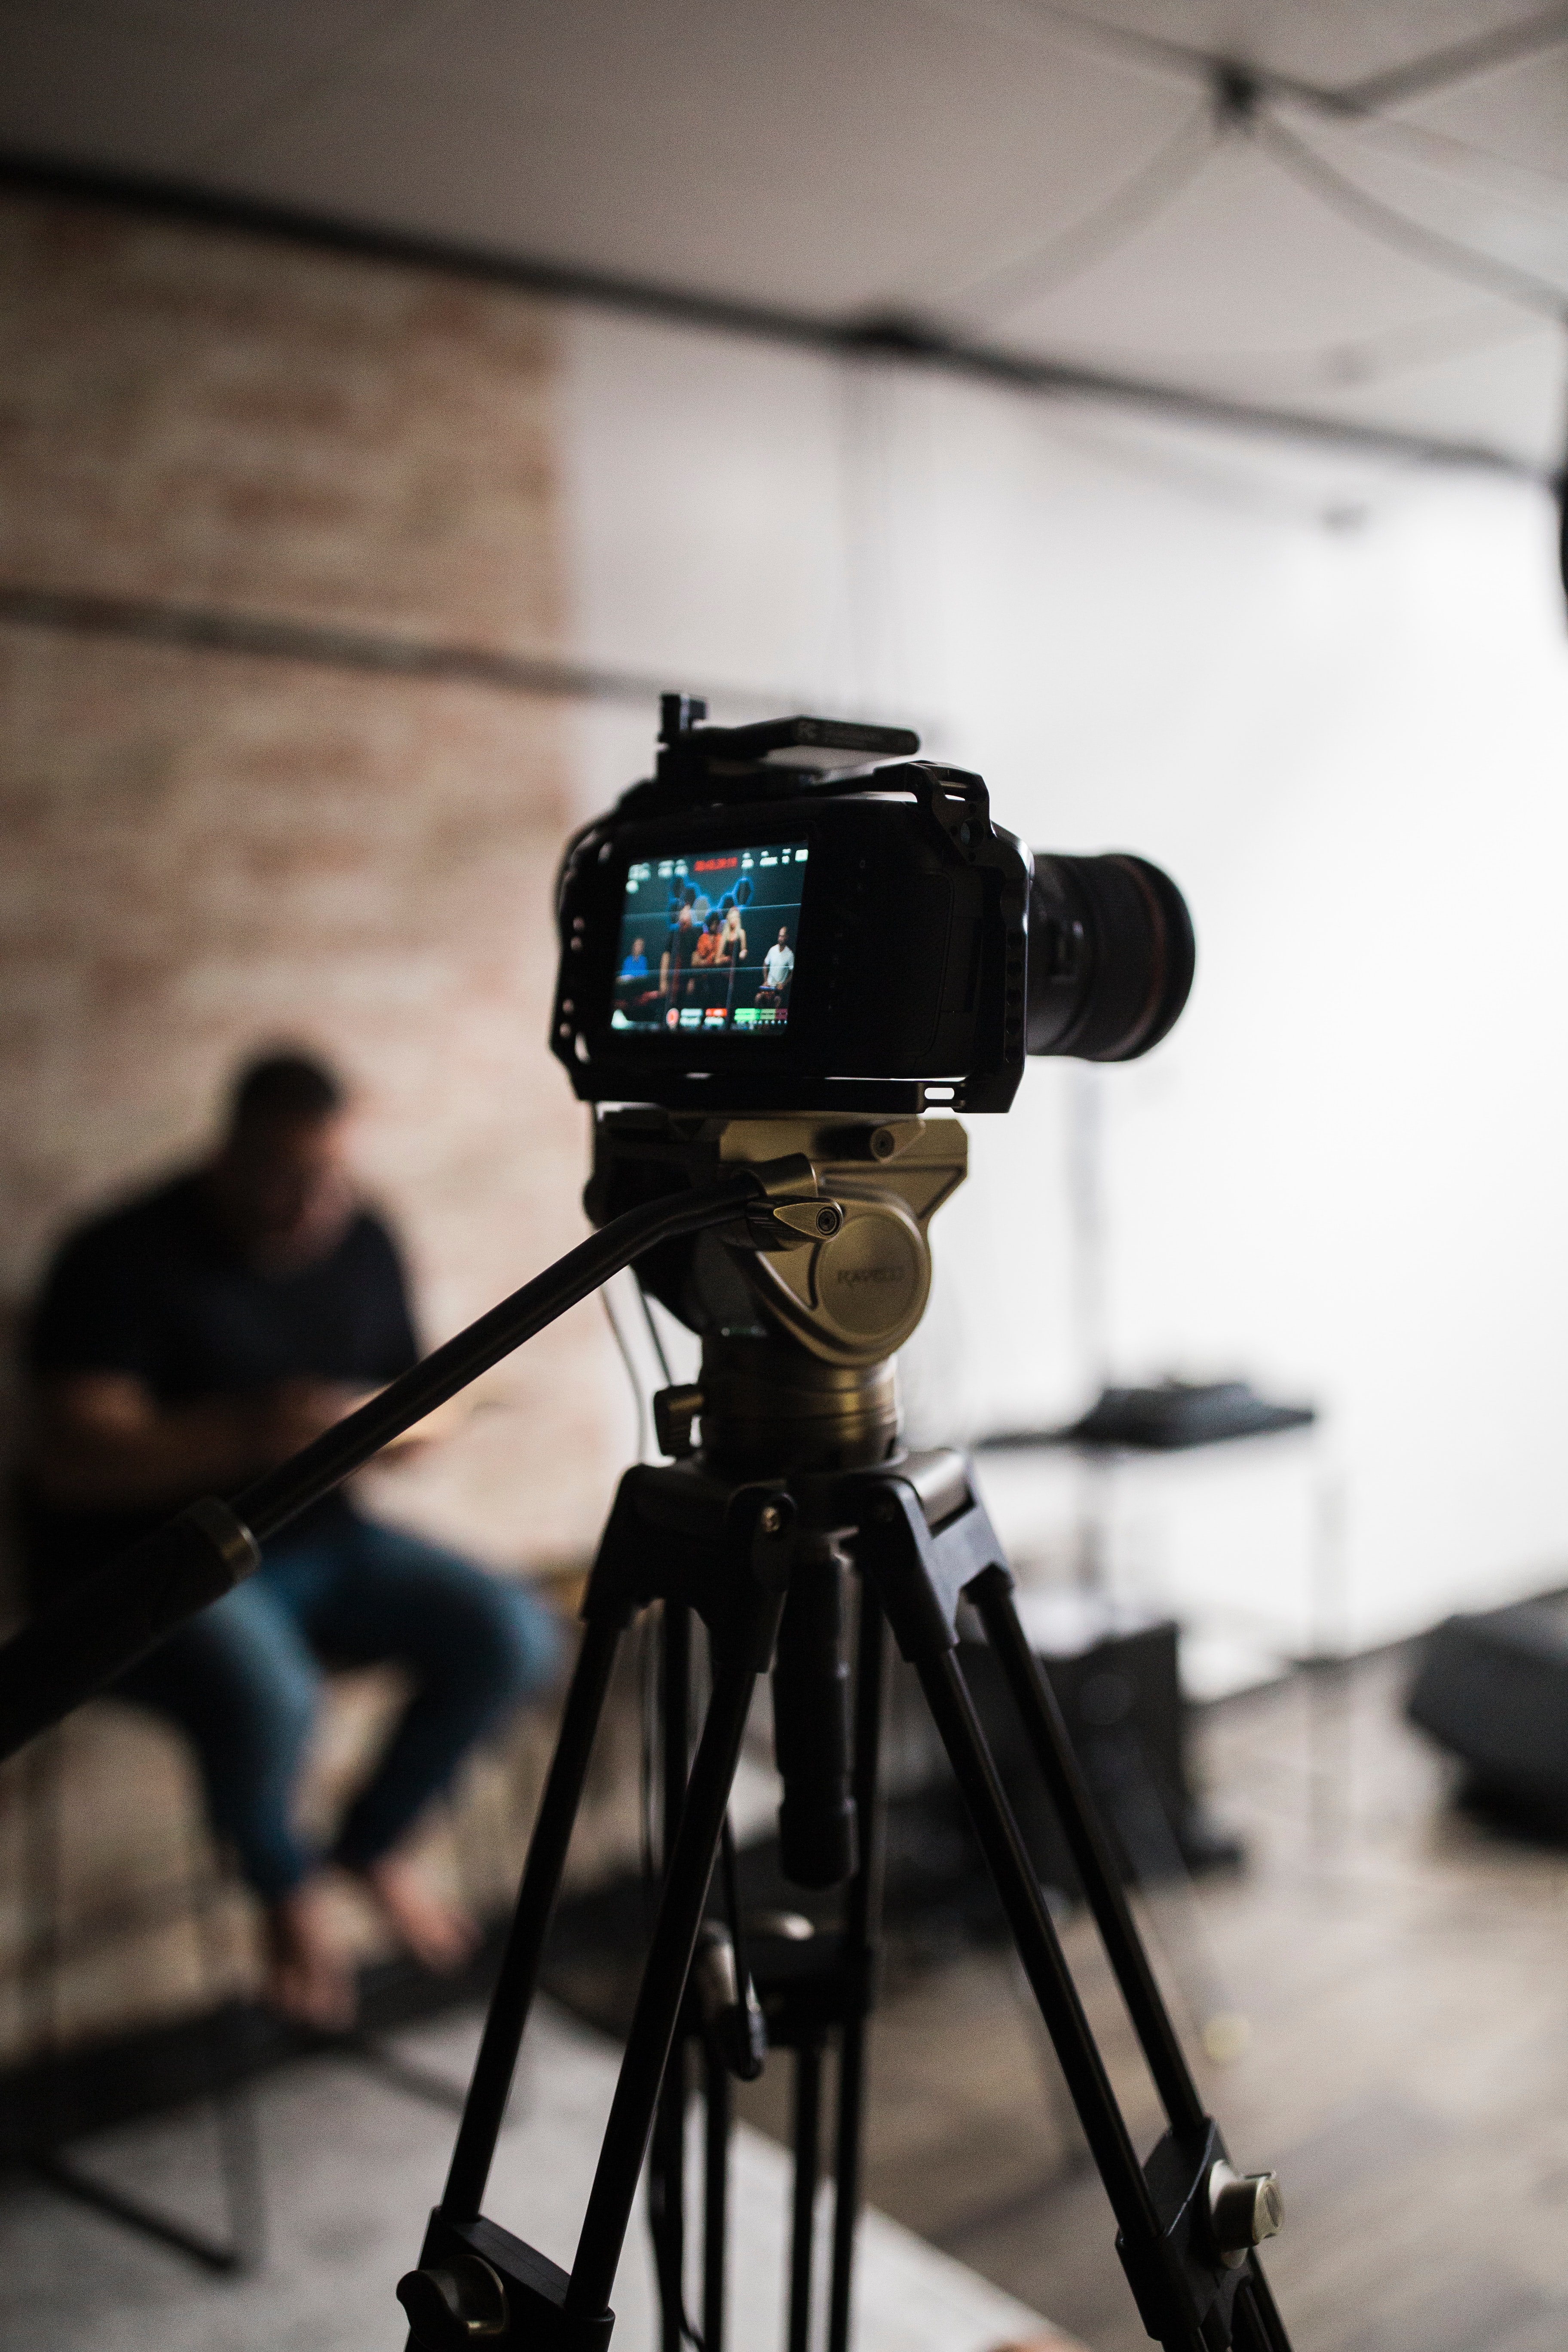
Photo by Jesus Loves Austin
To record a scene, the equipment and the setting must be prepared accordingly to the story board. Subsequently, the material can be recorded. Be not afraid to create multiple takes of the same scene. A little more material can help during postproduction as you will see in a moment.
Last but not least, consider to record b-roll. B-roll material can be anything, from video footage showing the landscape around you to certain image or video footage to support the content of your story. Take for example the organization of your development team. Imagine, you are organizing frequent meetings to discuss and schedule important tasks. The scene shows a developer of yours telling us how these meetings are structured. The developer is recorded in an interview style. Then a short cut to a room of people having a meeting can bring more emotions to your video. This short cut would be the b-roll material you want to have.
B-roll material can be used for a large varity of use cases. We will list here only a few. Firstly, b-roll material can soften a cut. Therefore, it fills the gap between two different scenes to create a more fluent change of settings. Secondly, you can hide mistakes in video while keeping the audio track. Thus, you may can use resources which would have been useless in another way. Lastly, B-roll enriches the video with information and makes it more interesting.
Postproduction
The postproduction step is all about editing and rendering the final video. It’s the final step before the acceptance test of your team.
To start with editing, begin logging your material. Check what material you have and for its completeness. Then sort and cut the primary footage (A-roll). Afterwards sort, cut and classify the b-roll material regarding its purpose. In this context, “sort” means to order material to its scene and “cut” means to remove mistakes and to cut a continous record in each essential parts (remember the note about voice overs above). Furthermore, it can make sense to transcribe the video footage to easily identify the footage in the later process.
After organizing your footage, you create the final story for the video. The script, the story board and the actual footage are the base for this task. Hence, the transcriptions help to sort the footage in the correct order.
Then, start to arrange the main footage roughly in the editing software of your choice. After having the basic story as a rough arrangement, Refine it multiple times by cutting each scene with the focus to emphasize the message - which is the most essential part. Later on, add some video effects. Some simple but powerful effects are transitions 2 3, close-ups 4 5, cutaways 6 7, and inserts 8 9.
Last but not least, add voice overs - respectively record them. Voice overs should be recorded as an overall scene. This helps to keep the emotion and pronounciation on a similar level. If you synchronize something, record while watching the actual video. If you mispronounce something or get stuck, go back a few sentences and record again. It is way easier to fix mistakes of recording while editing.
One of the most tending issues on voice recordings from home office are background noises. Therefore, we looked up some tutorials for our favorite tools, which we would recommend. They are a little bit redundant, but they differ a little bit in how much detail they provide. So we did not want to withhold you the information.
Tutorials for Adobe Premiere:
“How to Remove Background Noise in Premiere Pro”, Mike Russel
“Remove Unwanted Noise in Your Audio […]”, PremiumBeat by Shutterstock
Tutorials for Audacity:
Finally, render the video and prepare the acceptance test.
Toolbox
In this chapter, we list a subset of software for video and audio editing and recording. This list is a subjective recommendation, based on our experience and use in personal and academic projects. Since other products have similar features, you also can use these products.
Animation Production:
Adobe After Effects
Blender
PowerPoint
Video Recording:
Open Broadcasting Software
Video Production:
DaVinci Resolve
Adobe Premiere
Audio Production:
Audacity
Quality Assurance
Besides using a process like the one described above, there are further ways to implement quality assurance in a video project. We list a small subset of recommended measurements below.
Quality Control Measurements
Corporate Design
Often there is corporate design for public material of organizations. Also the University Ulm published this kind of guideline. We recommend to see through such guidelines to create unified designs.
SMART
To evaluate your product for the acceptance test, choose your product goals wisely. The SMART method is one way of doing so. It recommends to define targets specifically, measurable, attracting, realistic and terministic. Which means that a target should be precise in its definition. Everyone should understand what the target is and what the purpose of the goal is. The target should be measurable, so that is possible to evaluate whether the target has been reached. Furthermore, should the target be attractive. That means, that the target should be planned in a way that motivates you to accomplish the target. However, this often goes hand in hand with the aspect of reality. Proper targets are realistic - in their complexity, in the time planned to reach them and in the amount of resources it needs to achieve the target. The final and most important point is the deadline of a task. A time schedule having deadlines for each task helps to work on a project continuously and increases the probability to finish the project successfully. For more information refer to this article.
Assessment for handicapped persons
A script template that differentiates between spoken text and visual scene can help you to estimate whether your story makes sense for handicapped people. In case the template uses the form of a table, you can cover the column for visual scene and only read the spoken text. Thus, you can comprehend how blind people will experience your story. When you cover the line for spoken text, you can do the same to put yourself in the position of deaf people.
Review
Reviews are an important building block for quality assurance. It helps to detect issues before delivering the final product. The review of your team is the final challenge for the video before the acceptance test of the customer. Are there some mistakes in audio or video quality? Does everyone agree to the message conveyed by the video? If you are unsure whether the message of your video gets clear, ask friends and family for help. Let them see the video and ask them about their general impression. Then, let them summarize the video in their words to compare their understanding of the video with your goals.
Lessons Learned
In this section, we will discuss some lessons learned from producing educational videos as intermediate presentation as well as advertisement videos for the final presentation. In winter semester 2020/21, we reviewed more than 180 minutes of recorded presentations. These presentations showed a broad variety of different qualities and, therefore, enable a qualitative review. In this review we want to determine aspects which increase the level of interest and knowledge in the video. The goal is in our eyes that it is necessary to communicate knowledge and experiences but also to entertain and communicate in an appropriate and interesting (fun) way. This article is based on the results of a team-internal discussion after viewing all of the videos.
Good presentation practice does also affect video quality.
Do not overwhelm your viewers using your slides. Work with clear bulletpointwise and short statements. Set a clear picture of the information, e.g. using graphs or models, and explain them verbally instead of textually. Furthermore, the form of verbal presentation also plays an enormous role how people react on your video. You have the choice to lead your viewers in an interesting topic or into a boring sleep in their beds. Keep a motivating and clear voice. Do not speak monotonously or bored even if the topic is boring, since you want to transmit your experiences to a viewer. Viewers do not remember boring stuff, but do remember the exciting stuff. However, do not exaggerate! It is important to keep emotions balanced. Thus, the video shall not become to a dubious advertisement of your methods, but also do not read aloud a prepared script in a neutral voice just to checkmark your task. Another boring aspect of presentations in computer science is when people make a deep dive in usual code. Do not misunderstand, you actually can post code in a presentation. But that code fragment must fulfill some criteria to enrich the presentation. For example, only important and interesting snippets should be used. Never show large fragements of code and always point out the most interesting parts of the presented code.
Most of the time, presentations and videos have lower and upper limits for their length. Try to fulfill these, but do not worry if you miss them by a minute or so. It is way worse if you artificially extend the length, e.g. by pushing arguments why your video is shorter than requested. This is unnecessary information, because there is no further value for your viewers. Another issue for video quality is playbacks. Similar to a live presentation, it does not make sense to record audio on a prerecorded presentation. Since it is very hard to predict how much time a speaker needs for specific slides, such recordings will never really fit to each other. Such a recording method increases the pressure on the speaker which leads to more mistakes which might require more work in postproduction while keeping a high quality for the video. So never record on playback.
Entertaining videos increase the viewers’ motivation to keep following your presentation
From all videos, we mostly appreciated the ones that were recorded in style of an alive discussion between some developers. This kind of open dialog has been most entertaining and informative to the same time. We believe, that this may sources in the frequent change of speakers and in the form of topic changes. The latter is commonly introduced by sentences such as “in the following, we like to present <next topic>” or “and <person> presents you now <the next topic>”. Instead of that, discussions can introduce topic in more interactive ways such as “but there is another issue with <current topic> which could be solved by <developer> who will tell you his story about that issue”. This kind of formulation involves the audience way more than the previous example. Similarly, live previews involve the audience and give them a better impression of the project’s vision. Therefore, write a small story and show only the main aspects you want to show the audience. You do not need to present every detail such as specific filter options. It is enough to lead the audience through your application and present in case of the intermediate meeting mostly the parts your team accomplished.
A good storyline attracts and catches the viewers’ interest and focus.
Communication is complicated and presenting facts only tend to be boring. Furthermore, facts cannot be remembered that good. To increase the amount of information that viewers remember, it is advised to speak to them on an emotional base. Therefore, tools such as storytelling have a huge effect on viewers. Another side effect of storytelling is the binding to the viewer which is built through the story and will persist long after. This type of Communication can be seen in the advertisement industry, which is why it can be inspiring to analyse some advertisement you like. Furthermore, it is best practice to set your viewers on a common base level of knowledge. This enables the viewers to empathize with your team and to understand your vision of the project. The common base level of knowledge must cover the motivation and the context of the project. The motivation or context can be related best, when the current situation is described and issues and challenges are shown.
A precise specification of recording properties can avoid additional production efforts.
Often, the most time of video production must be invested in postproduction and media selection. Therefore, every chance to reduce that time should be used. One way to reduce postproduction time is to specify the requirements for recordings in detail. Have a look on the following example specification:
Property |
Specification / Explanation |
Notes |
|---|---|---|
Recording Resolution |
Full HD, 30 FPS, 1920x1080px, 16:9 |
|
Assign Tasks |
Speaker Part A: John Doe Speaker Part B: Jane Doe Video Production: Jane Doe |
Assign Tasks in advance |
Speakers 1 |
should have access to microphones that do not have huge background noise |
This can be fixed by using specialized audio software |
proxy speakers 1 |
see ‘Assign Tasks’ and ‘Speakers’ |
This is optional and we needed that once, but if your team is not well organized to react quickly on absence of team members, it is helpful to also define proxies in advance |
time limits |
5 minutes per team |
Specify the approximate time for each part of the final video |
Slide Template or Master Slides |
Example presentation or provide or provide a template with Master slides |
This is necessary to |
Deadlines / Production Plan |
|
Early, inlude quality measures in your production plan.
As you planned the deadlines in your specification, you should also have in mind to plan the reviews for each step. This is necessary to adapt feedback early and decrease the impact of changes from previous on later steps. Especially, the review of the slides in a timely manner can prevent massive workload during recording due to typos or mistakes in pictures or graphs since these cannot simply be exchanged. Furthermore, review the recordings to detect bad video and audio quality. These can distract the user and it may take more time to fix them in postproduction instead of rerecording which also can be done partially and later cut into the video. Furthermore look out for correct word choice and try to avoid uhm-sounds or phrases like “I don’t know”. These do not add value to the video but may break the flow. Instead of the phrases you can try to add breaks - just take a breath and say nothing, concentrate on your next sentences and continue. Breaks can be a great tool to help the viewers to follow you and furthermore, can be used to emphasize the following topic, which basically means to make the audience curious about the content which comes after the break.
Review the final product and fix small aspects.
Also plan some time to give every team member the chance to review the final video. A final review can detect a large variaty of mistakes such as cutting fauxpas. All of these can disturb the flow of the video and have a distractive effect on the viewer. Another final goal is that all team members can agree to the picture the presentation draws from the project and the team.
Data protection must not be ignored!
Please note, we added this section after we observed this in a final intermediate video of another team. The mentioned video has been spread to all other project teams. We do not want to offend that other team, however, with this example we want to point out that this is a serious and real scenario. If you share some protocols or create a live review of your project, publishing sensitive information about real world people must be prevented! It does not care whether it is a team member or a user of your system, you must not spread information about them without their consent. In best case use mockups for live reviews and never reveal real protocols of internal meetings which contains sensitive information. Please take this last section seriously.
Sources:
Footnotes
- 2
Transition (1), Filmlexikon Uni Kiel, last visit: 11th June 2021
- 3
Transition (2), Filmlexikon Uni Kiel, last visit: 11th June 2021
- 4
Einstellungsgrößen, Filmlexikon Uni Kiel, last visit: 11th June 2021
- 5
Close-Up, Filmlexikon Muth Media, last visit: 11th June 2021
- 6
Cutaway, Filmlexikon Uni Kiel, last visit: 11th June 2021
- 7
Cutaway (filmmaking), Wikipedia, last visit: 11th June 2021
- 8
Inserts, Filmlexikon Uni Kiel, last visit: 11th June 2021
- 9
Inserts, Filmlexikon Muth Media, last visit: 11th June 2021